What you’ll get
Once connected, Claude can:- Browse your data layers and explore their structure
- Run SQL queries against your data
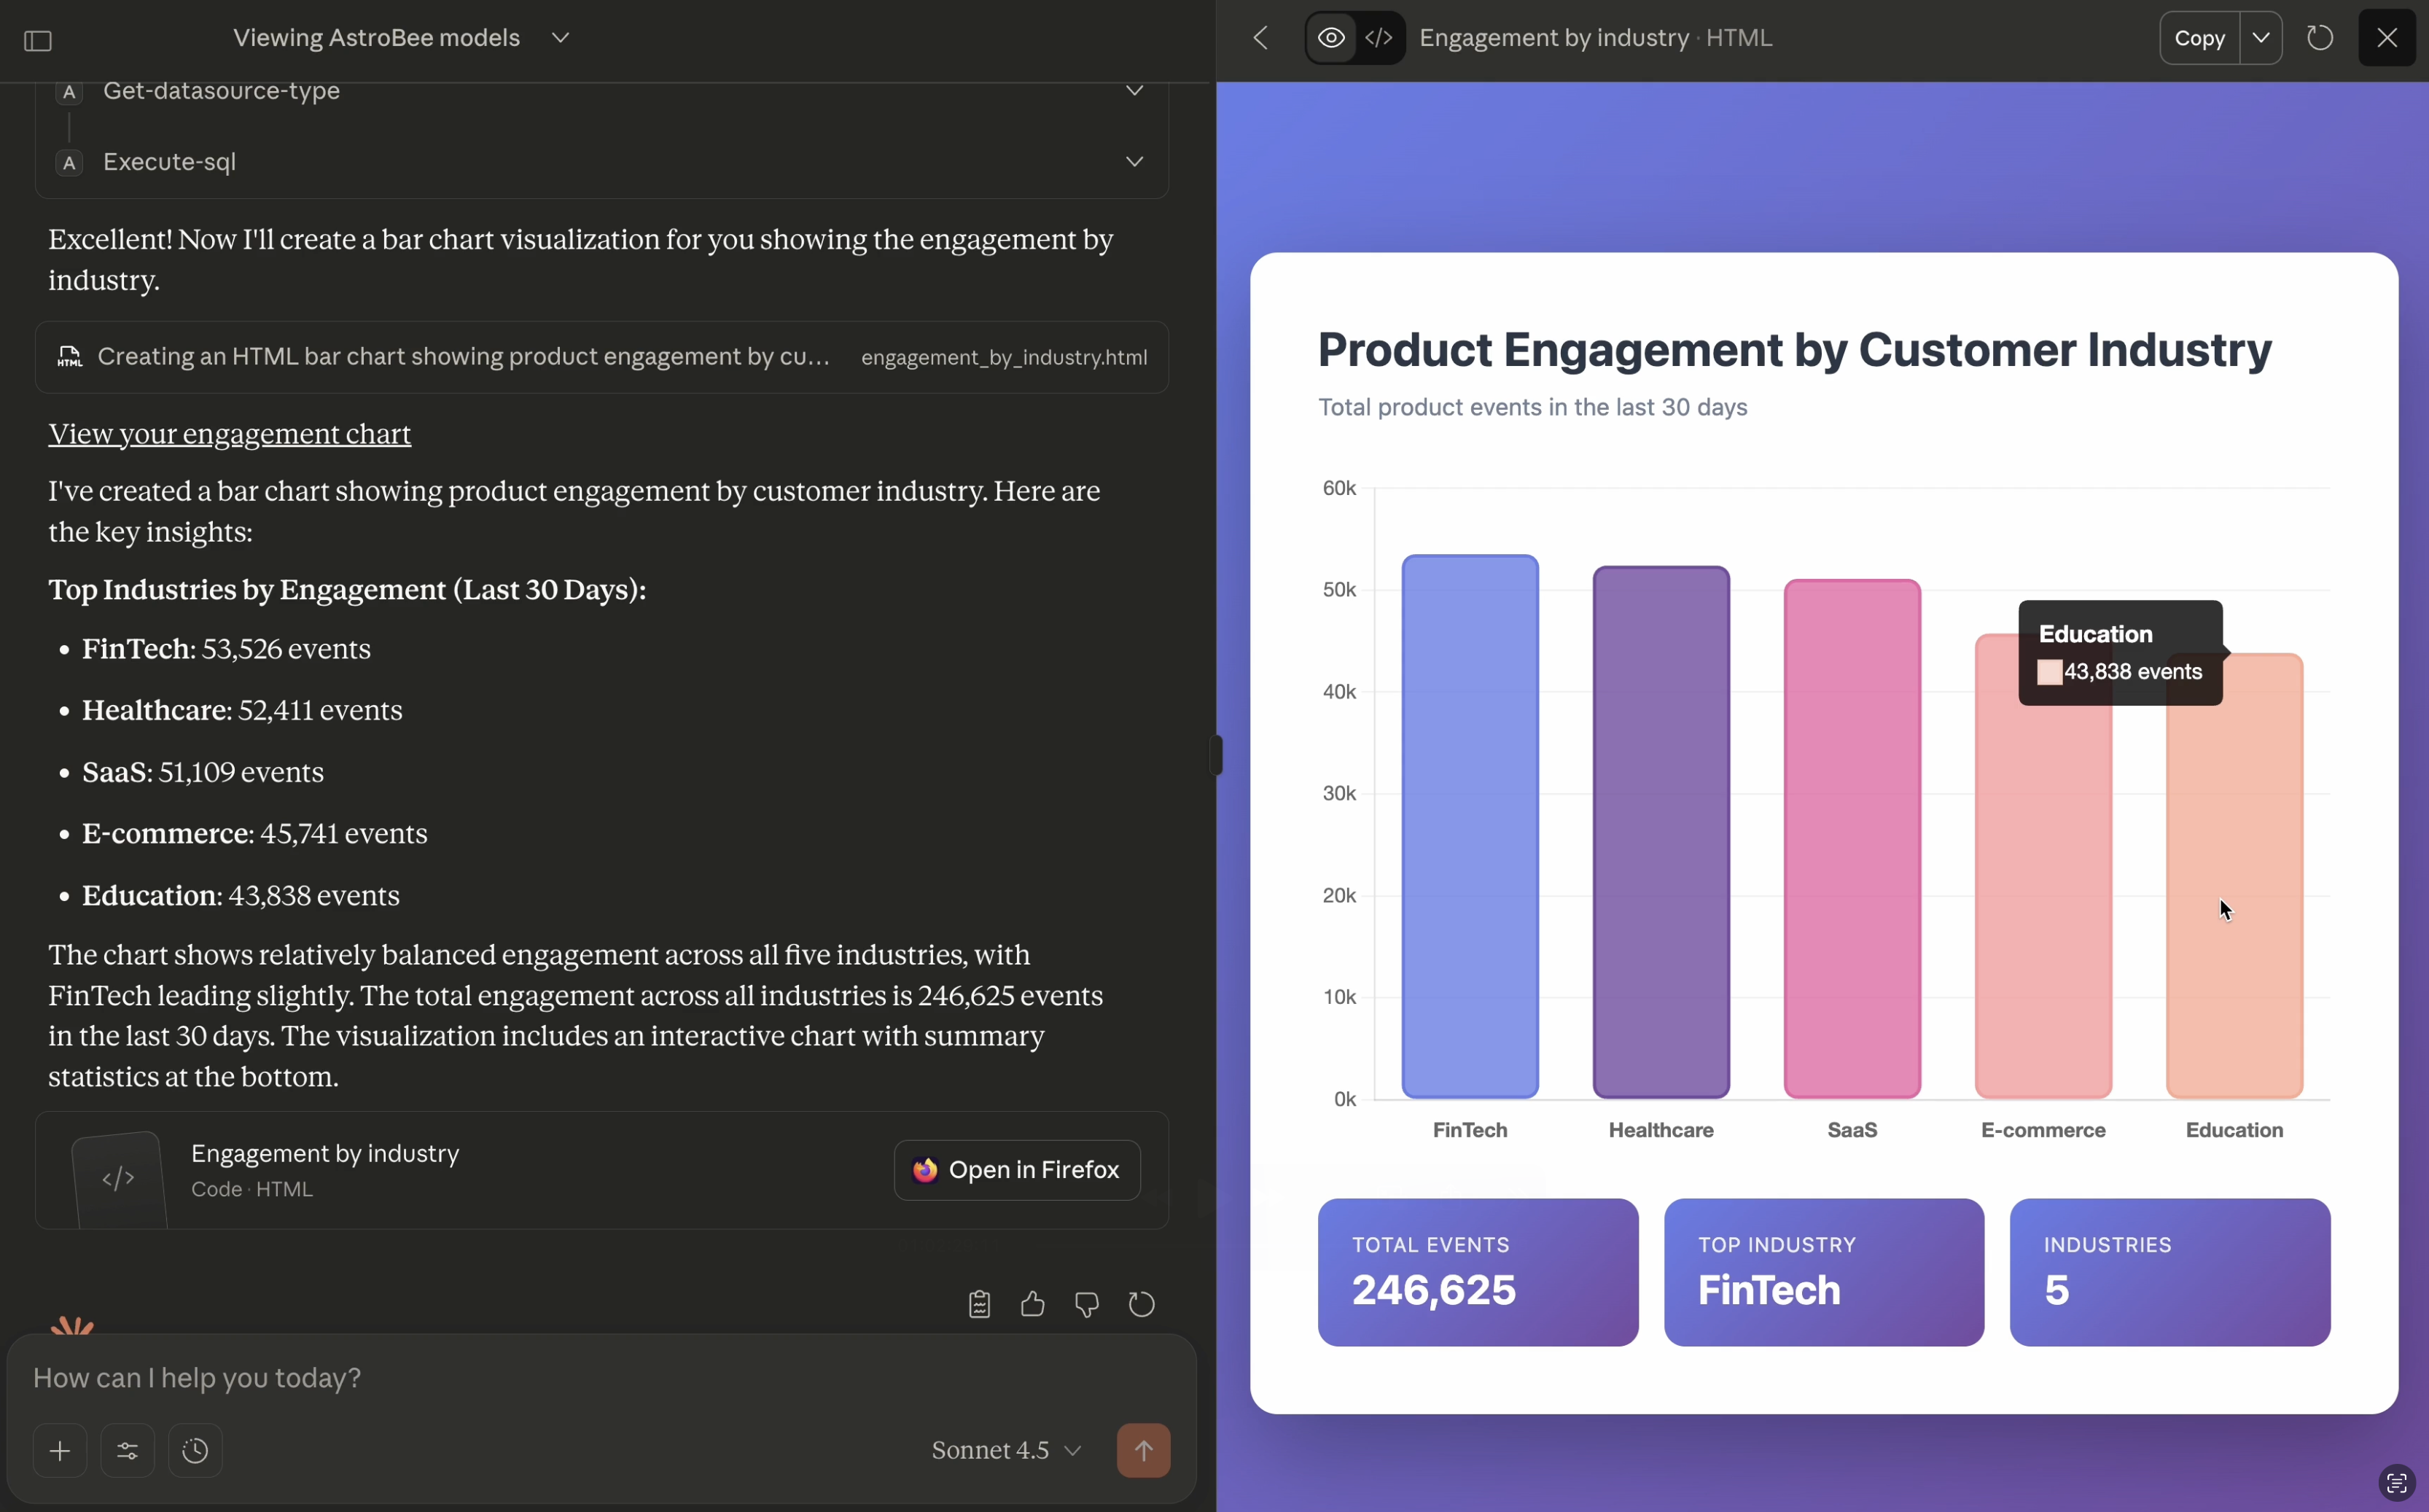
- Generate charts and visualizations
- Discover hidden relationships across your data sources
For editing data layers, use the AstroBee web interface rather than MCP tools. The web interface provides optimized workflows that prevent token overhead and maintain data layer consistency. If you have a specific use case that requires programmatic data layer modifications, contact us at [email protected].
Prerequisites
Before you begin:- AstroBee account with data: Complete the quickstart to set up your account and create the demo data layer. This gives Claude something to explore.
- Claude Desktop app: Download and install Claude Desktop (available for Mac and Windows). You’ll need a Pro, Max, Team, or Enterprise plan subscription to use custom connectors.
Connect Claude Desktop
Open connector settings
In Claude Desktop, click your profile icon in the bottom left, then navigate to Settings → Connectors.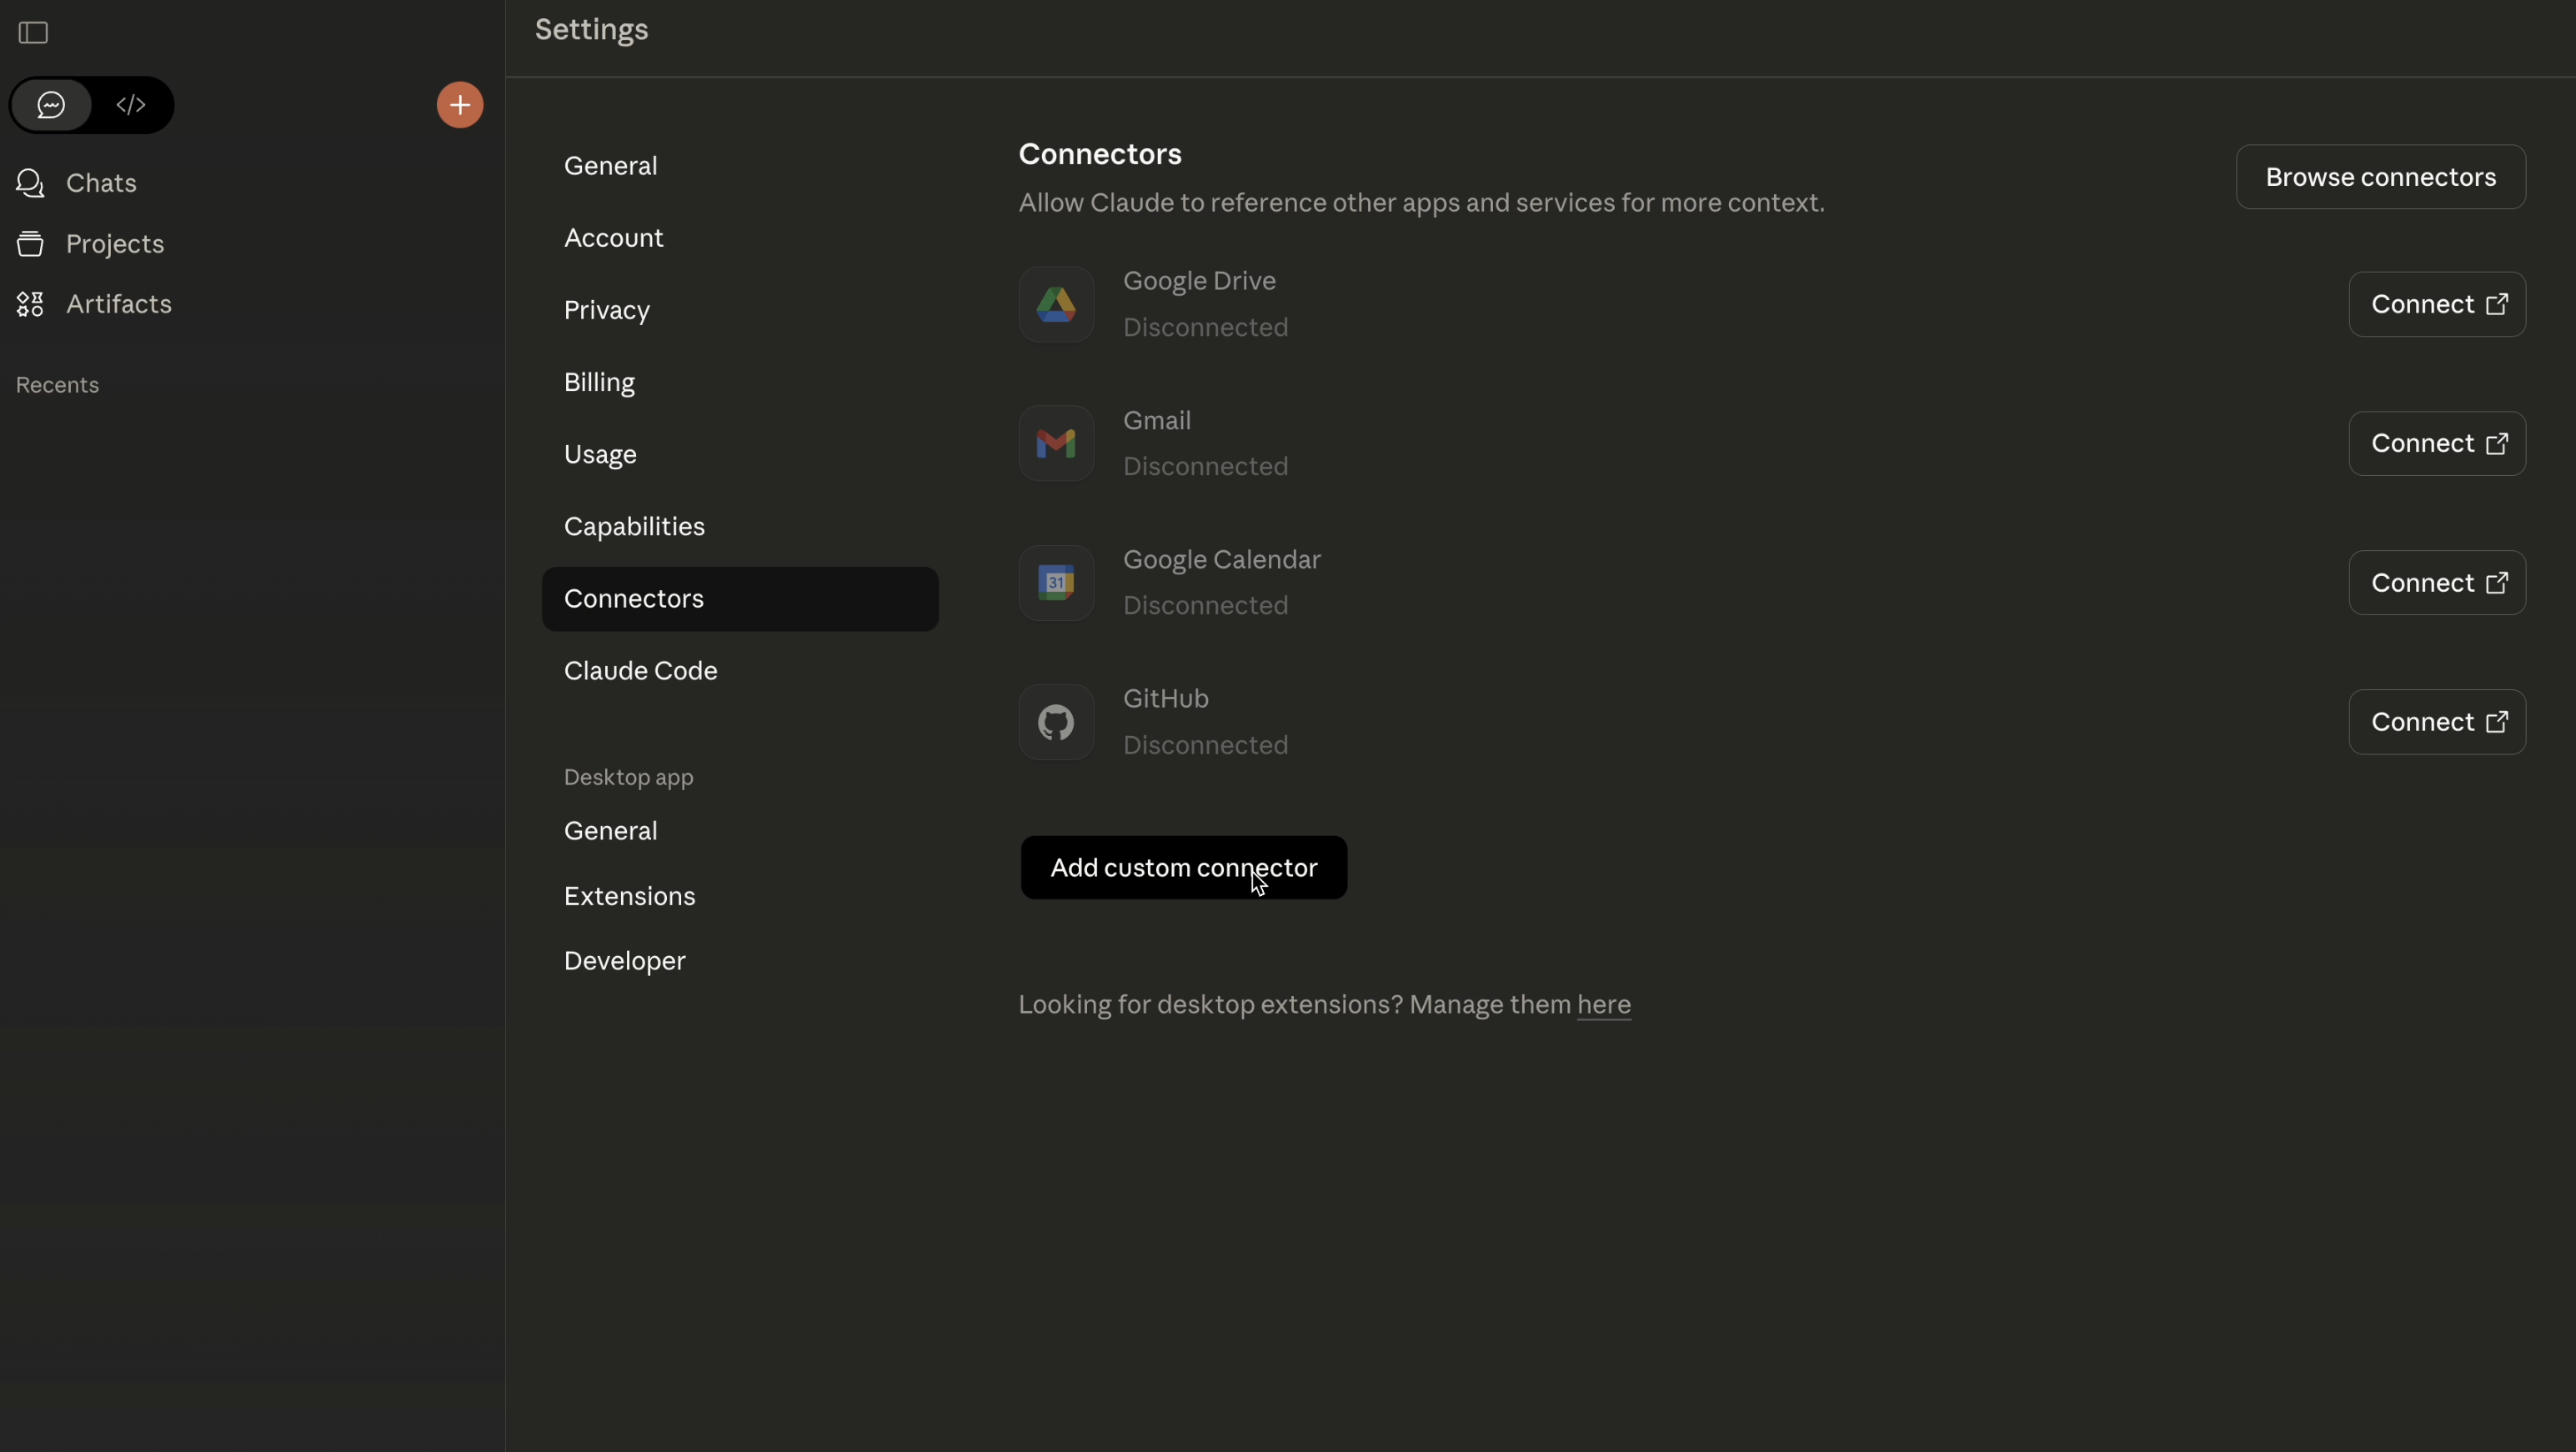
Add AstroBee MCP server
In the connector dialog: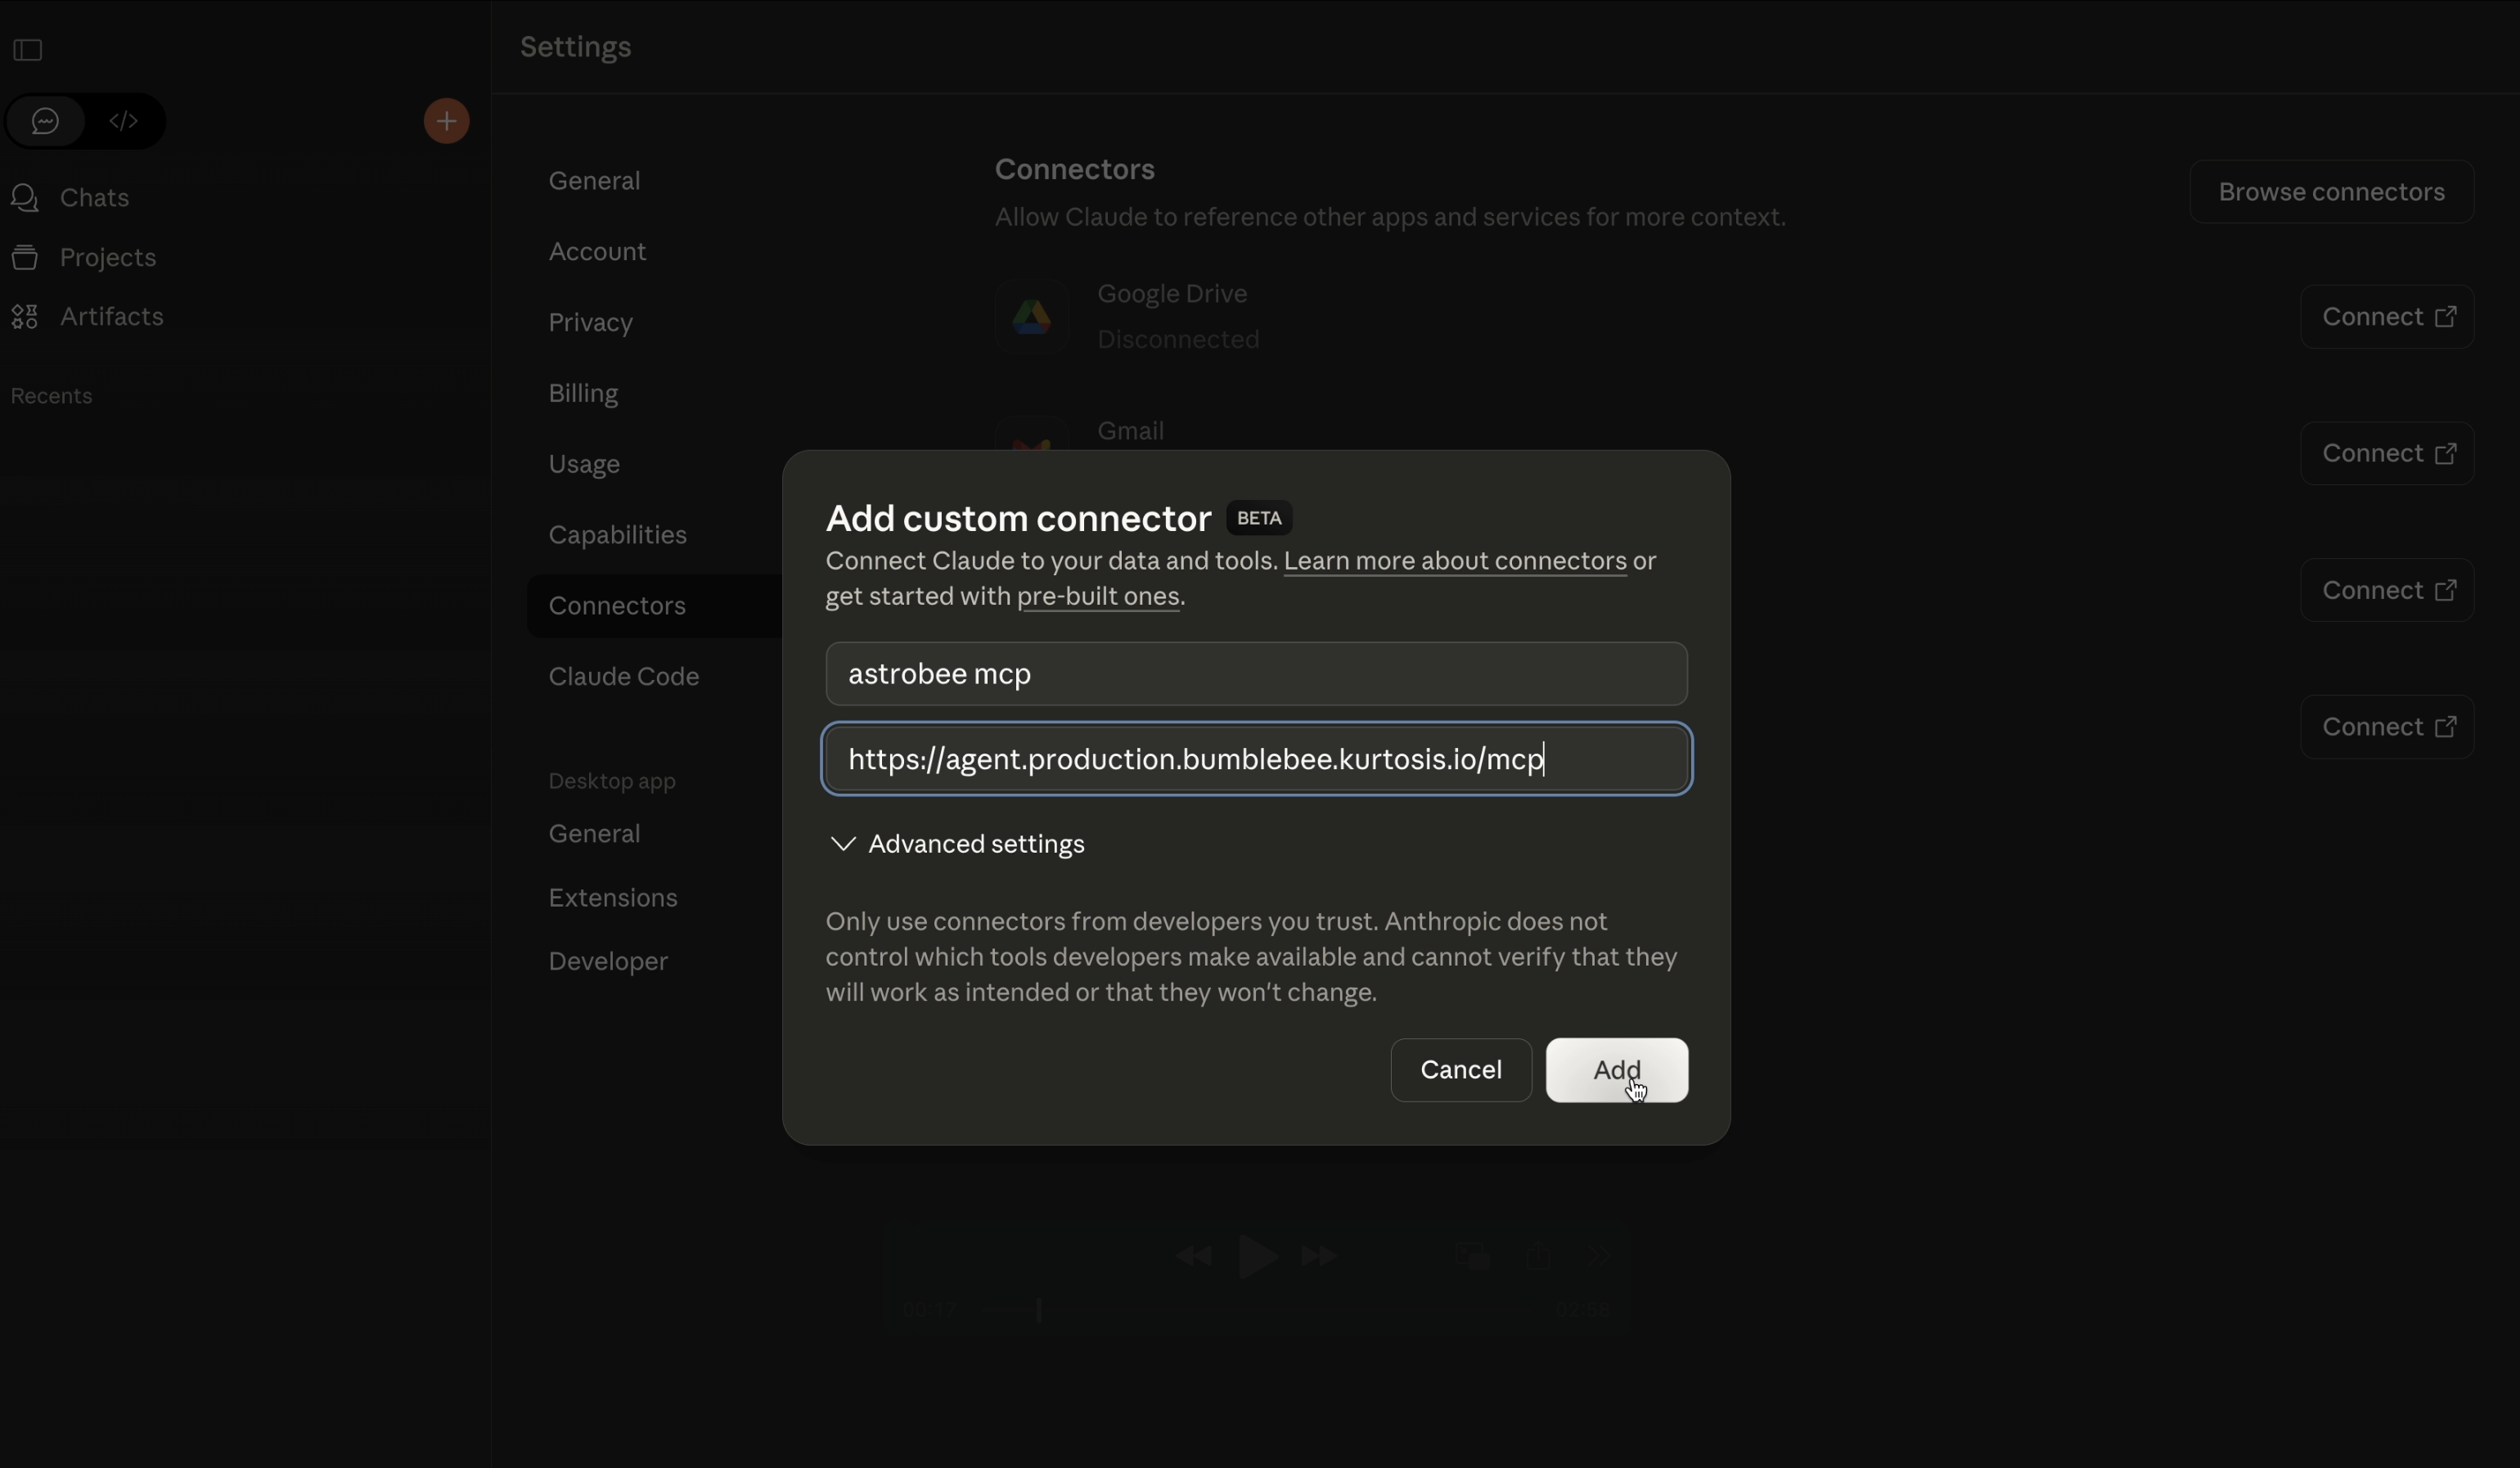
- Name: Enter a descriptive name like
astrobeeorastrobee mcp - Remote MCP server URL: Enter the AstroBee MCP endpoint:
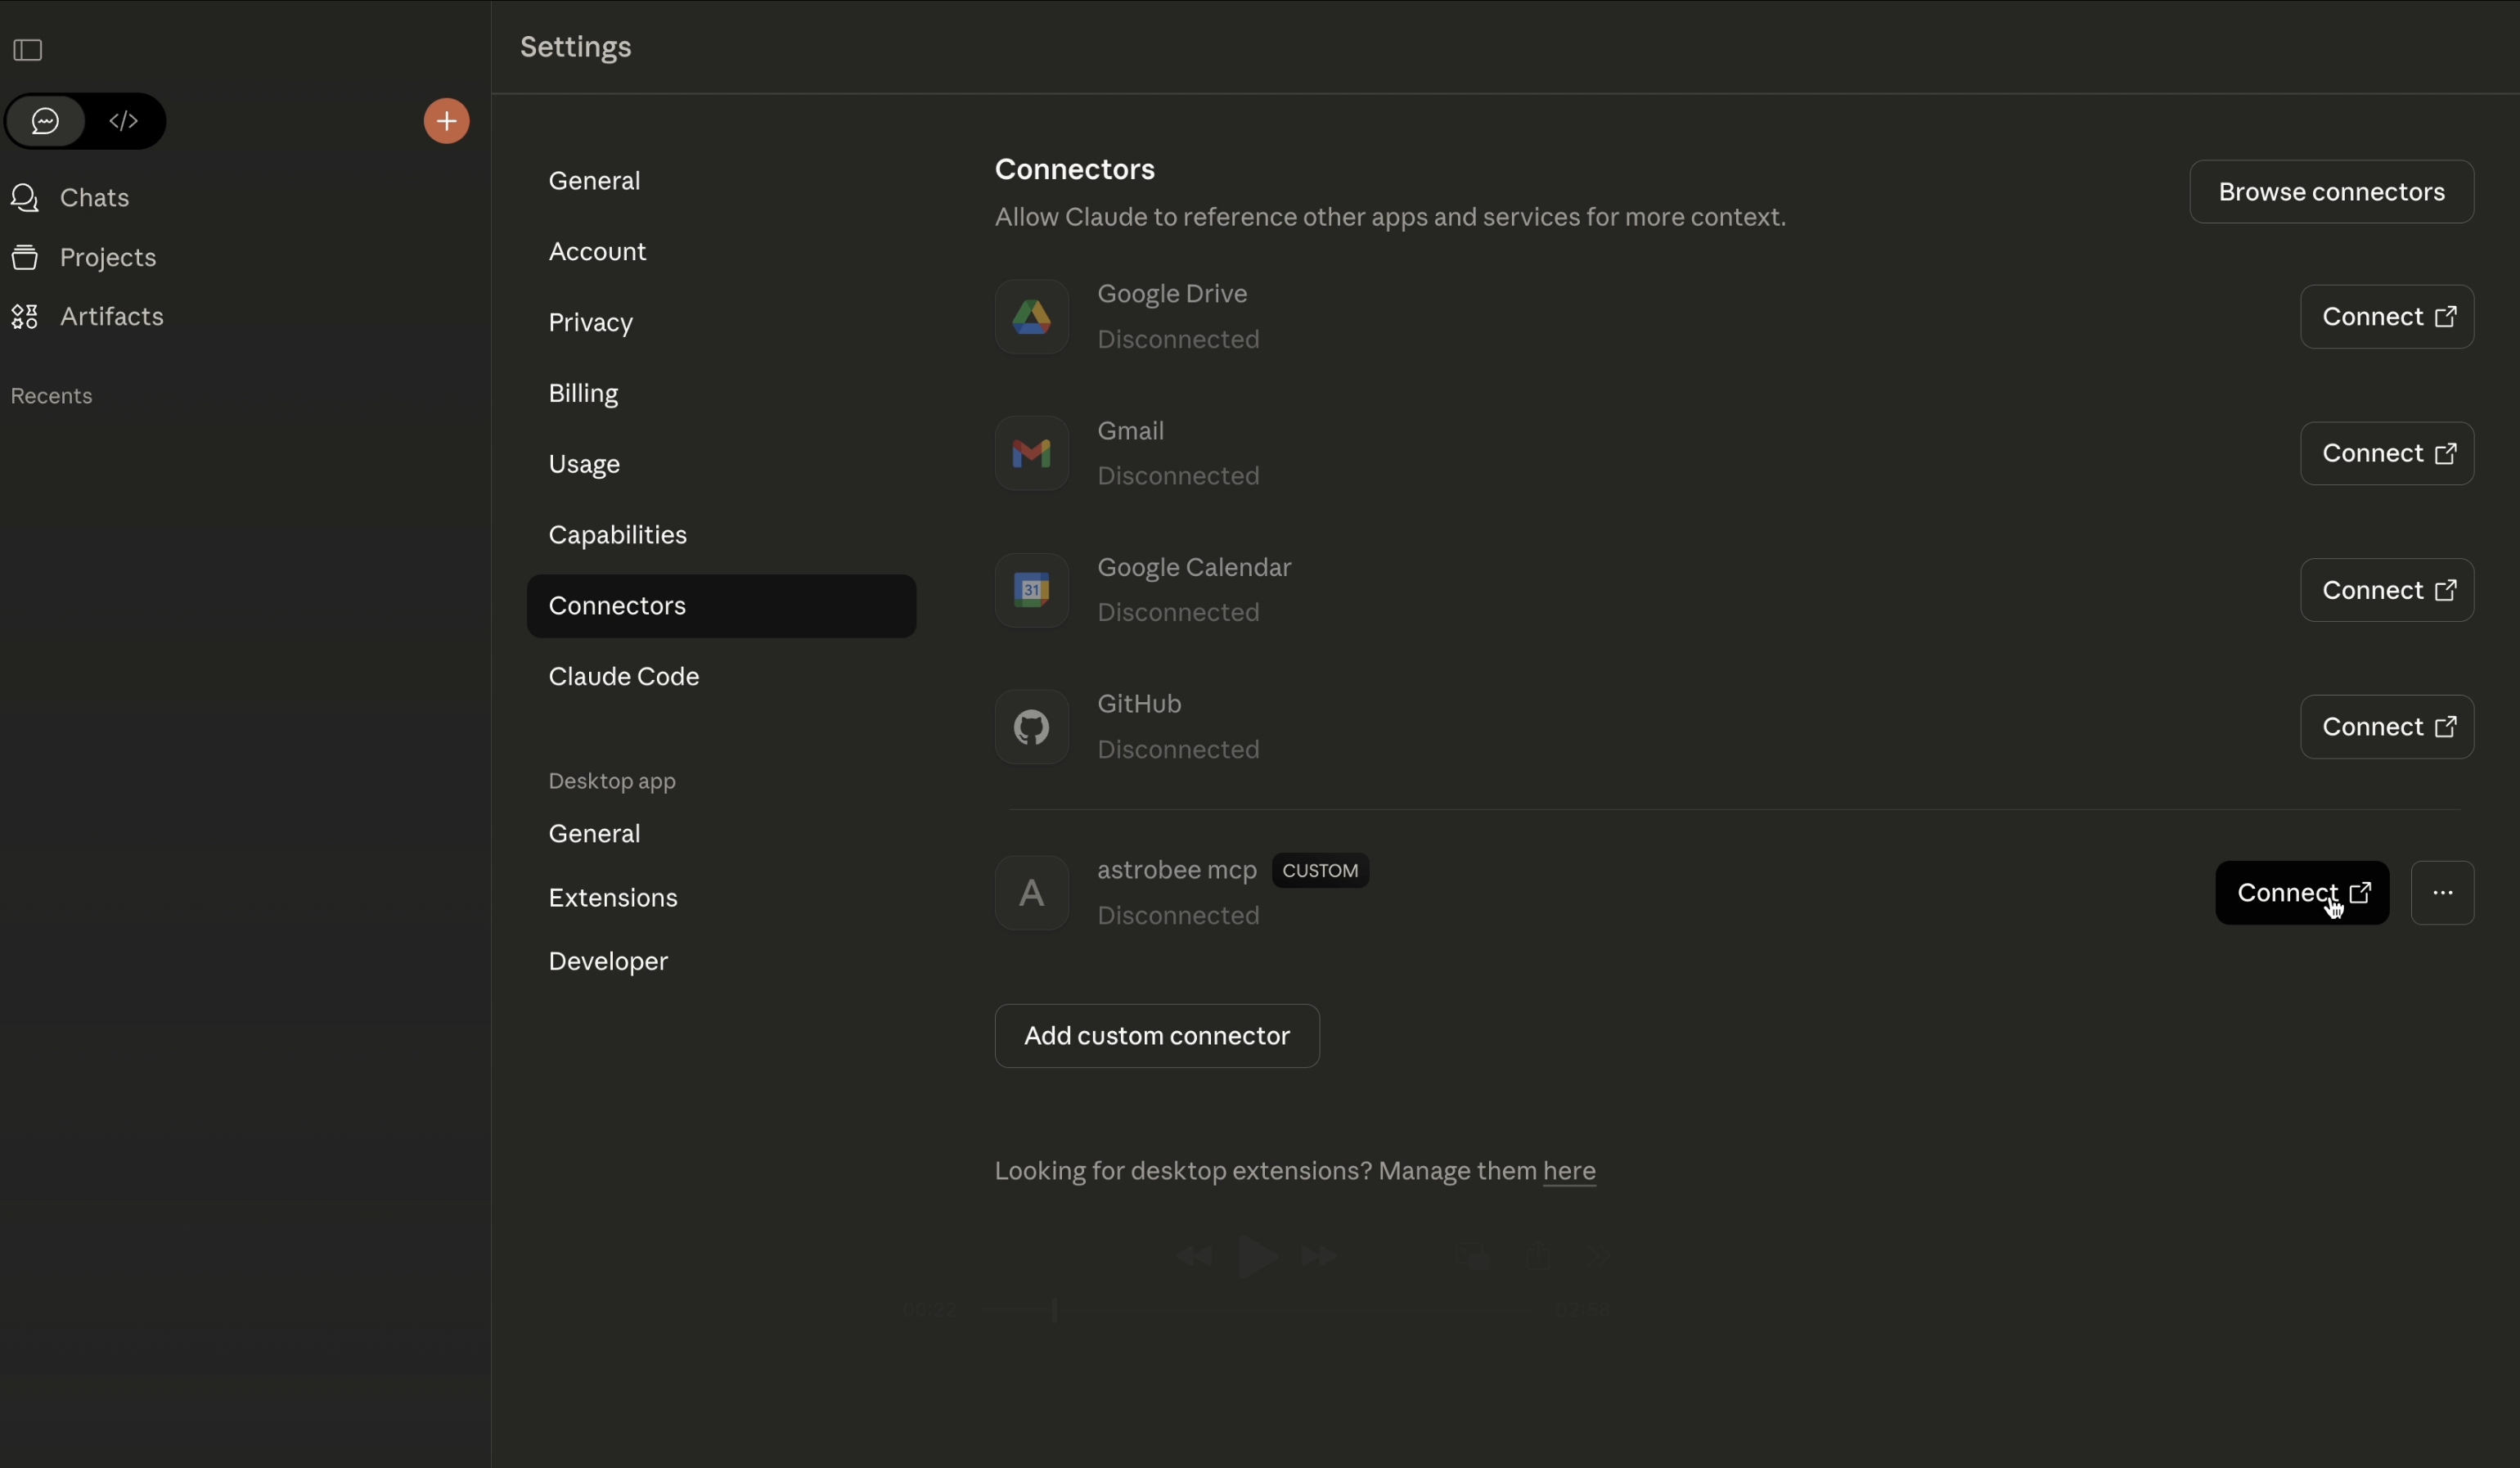
Authorize the connection
Click the Connect button next to your AstroBee connector. This opens your browser with an authorization screen. Select the Google account associated with your AstroBee account and sign in.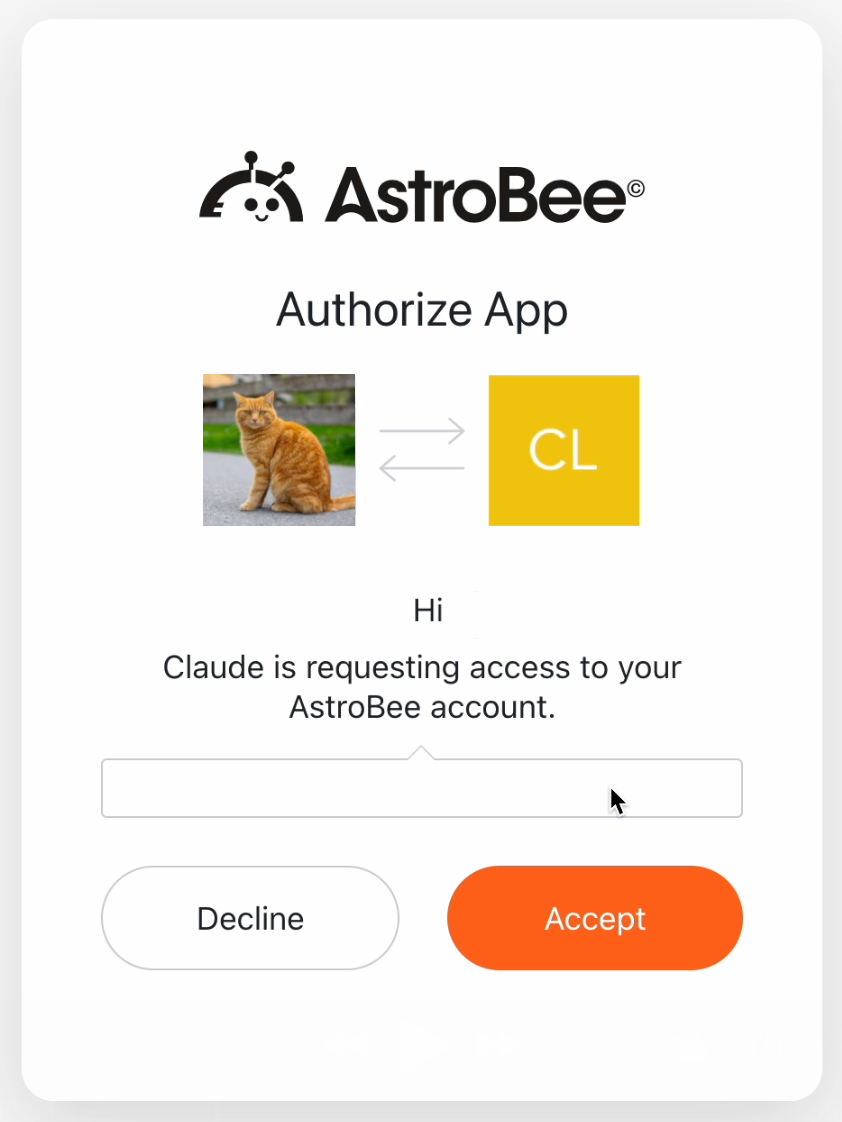
Start exploring your data
Close the settings and start a new chat. Try asking Claude about your data: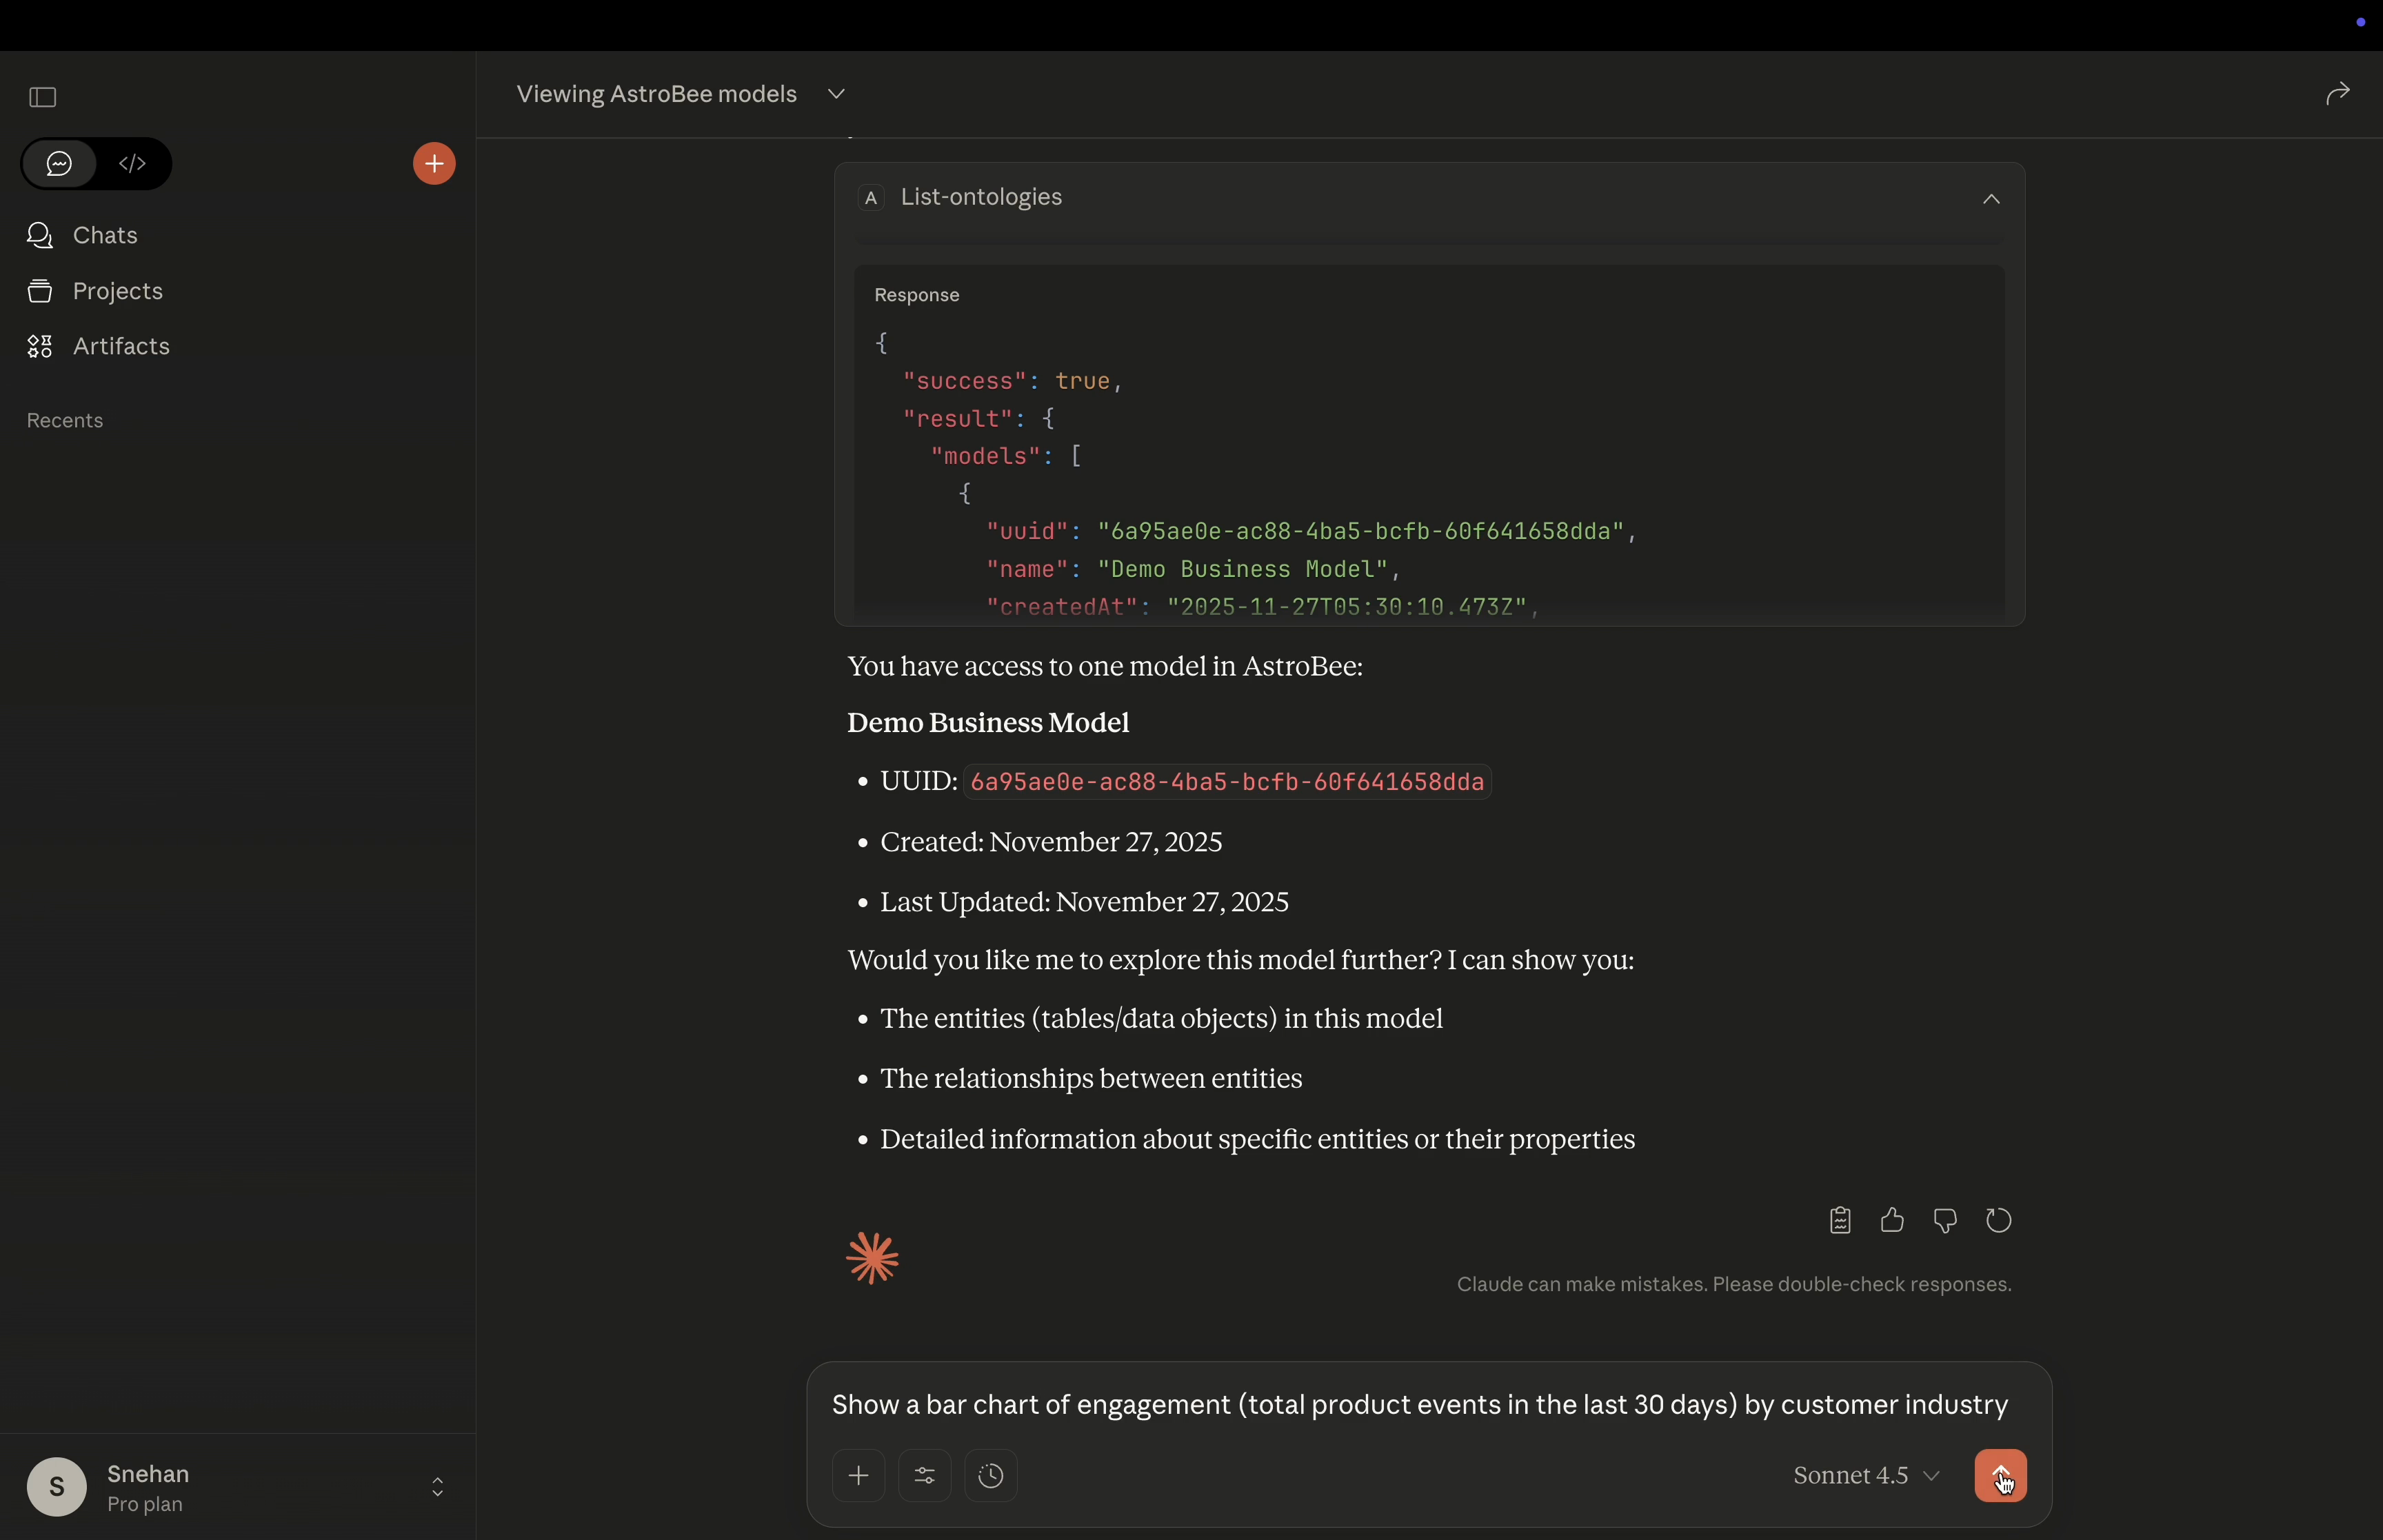
How it works
When you ask a question, Claude:- Uses
list-ontologiesto see your available data layers - Uses
list-entitiesandlist-relationshipsto understand the data structure - Uses
execute-sqlto query your data - Formats the results and generates visualizations
Troubleshooting
Connection fails with 'Failed to reconnect to astrobee'
Connection fails with 'Failed to reconnect to astrobee'
If you see this error in Claude Desktop:
- Check that you’re logged into your AstroBee account at app.astrobee.ai
- Try disconnecting and reconnecting the connector in Settings → Connectors
- Make sure you clicked Accept on the authorization screen when prompted
- Verify you’re using the correct MCP server URL:
https://agent.production.bumblebee.kurtosis.io/mcp
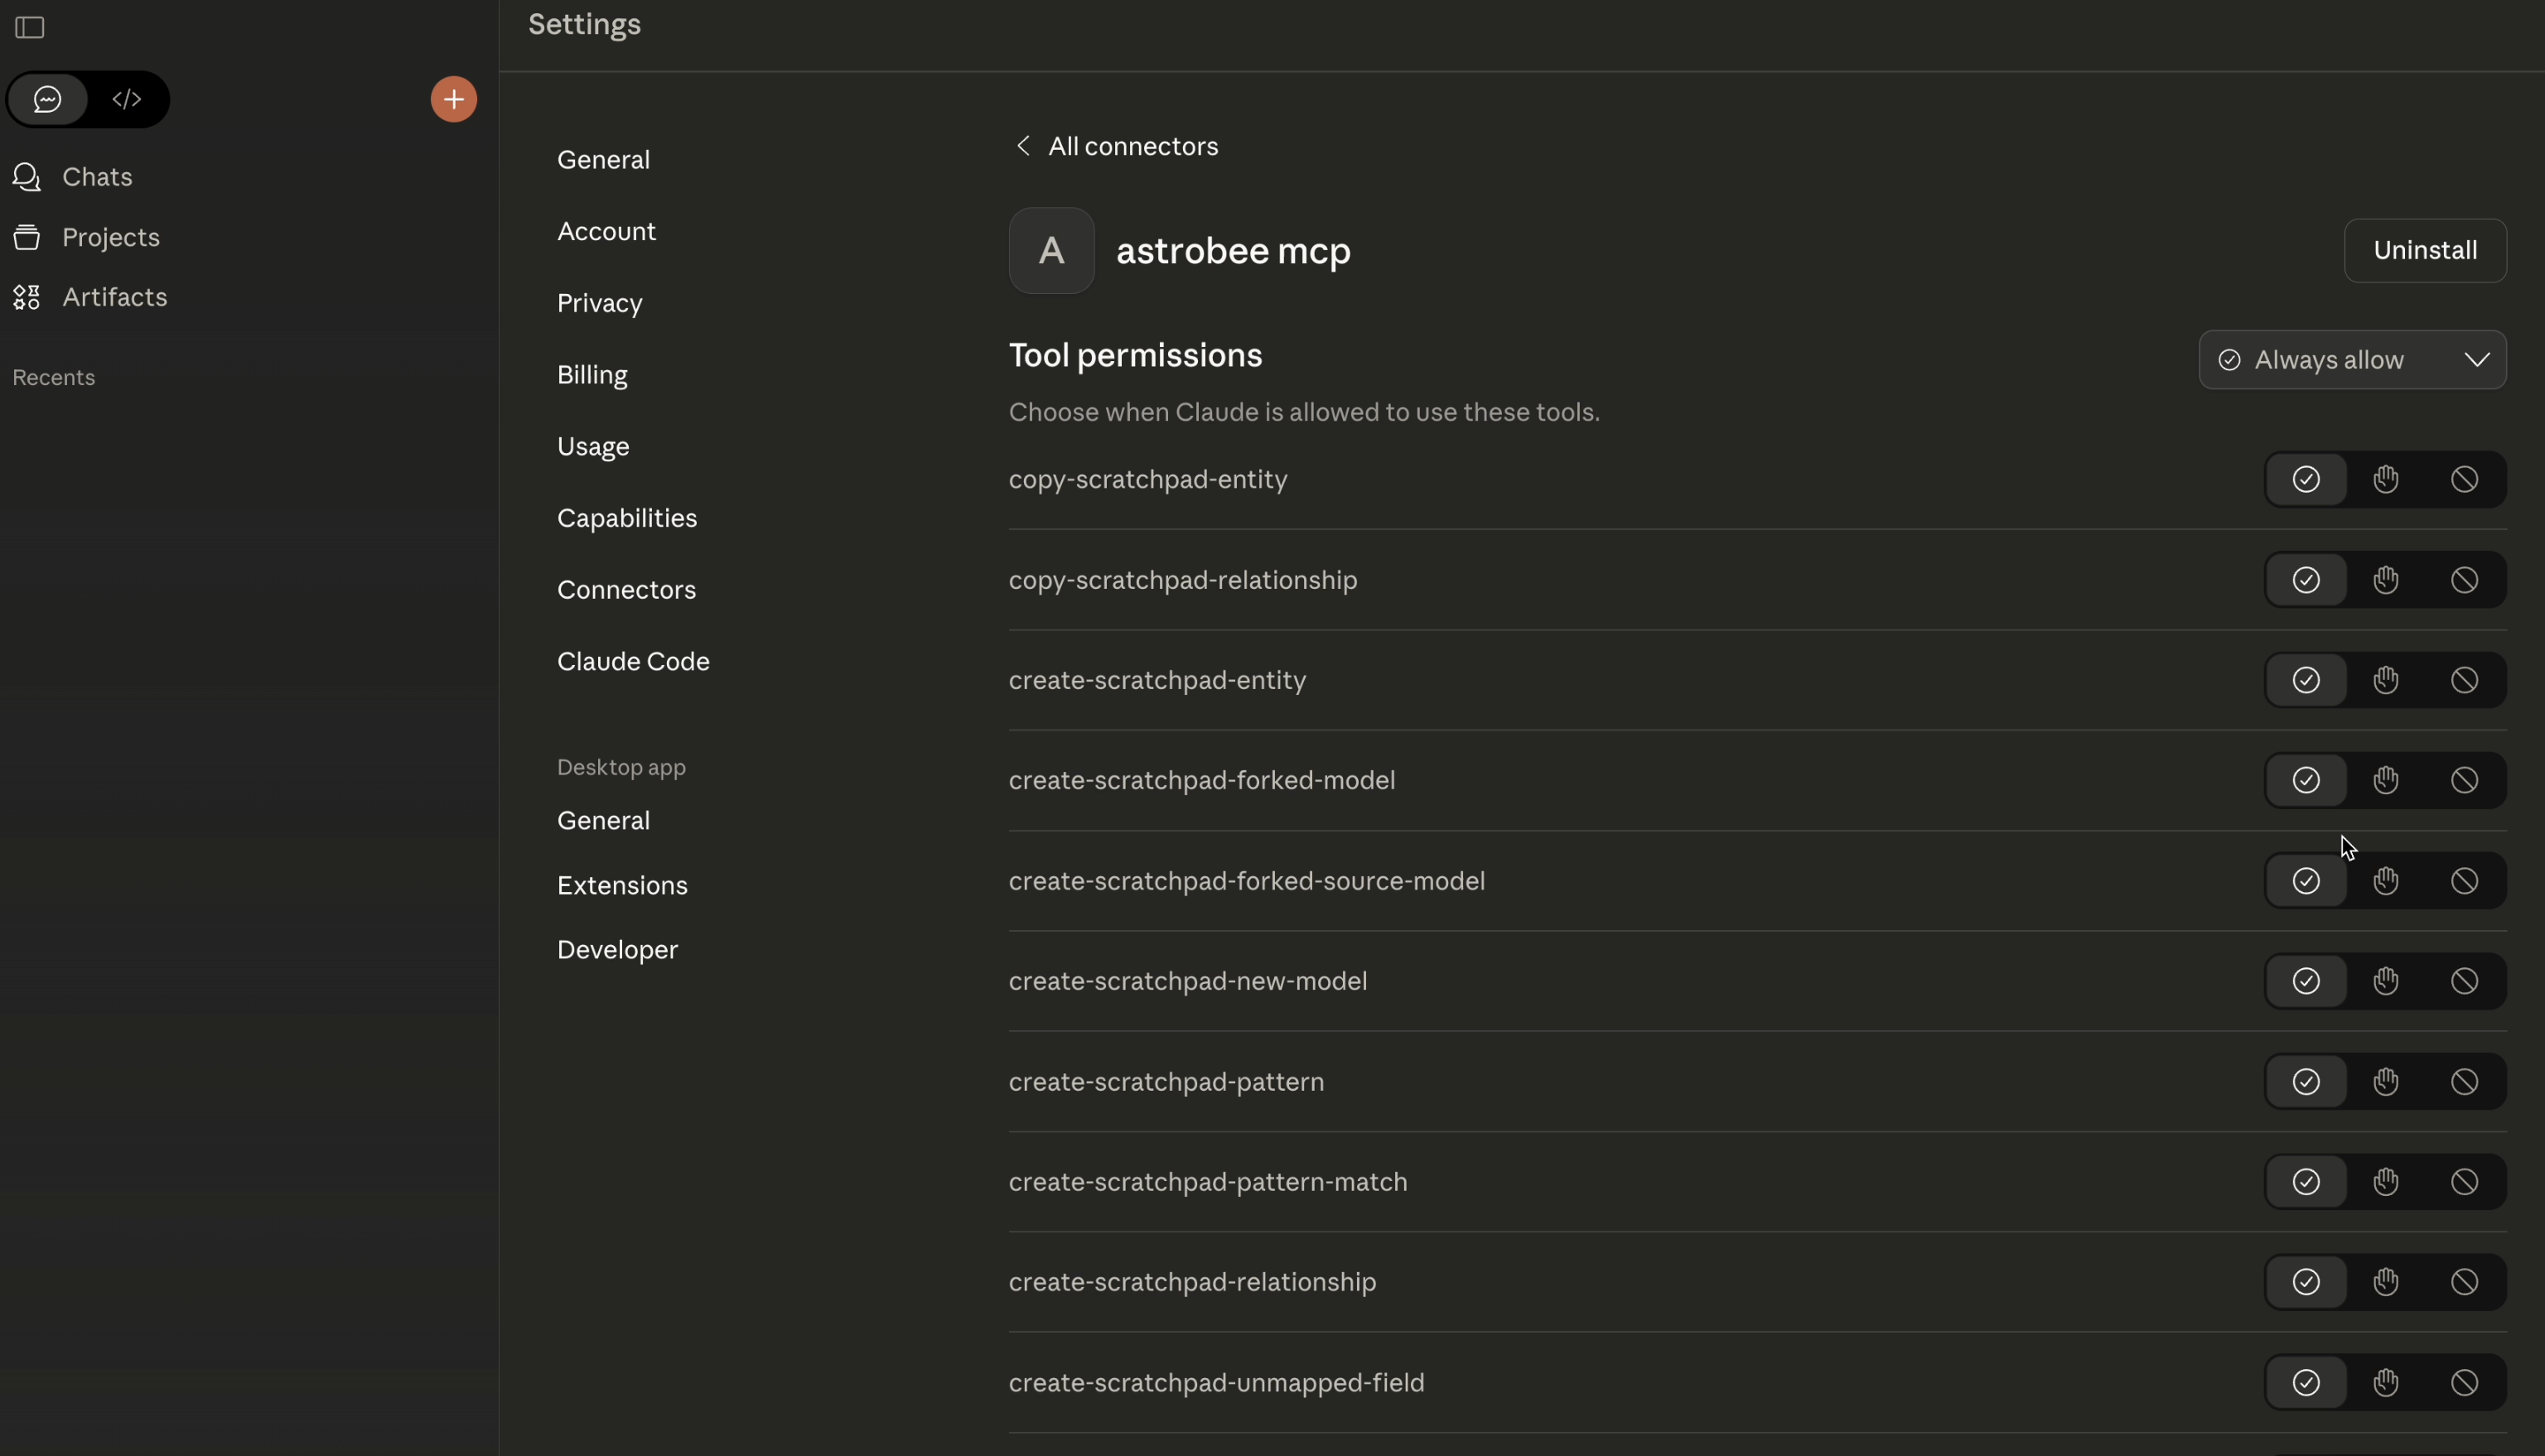
MCP tools don't appear after connecting
MCP tools don't appear after connecting
If the tools list remains empty after authorization:
- Close and completely restart Claude Desktop (not just refresh)
- Navigate to Settings → Connectors and verify the connector shows as connected
- Check that your Claude subscription includes custom connectors (Pro, Max, Team, or Enterprise)
- Try removing and re-adding the connector if the issue persists
Claude says 'No models found' or can't access data
Claude says 'No models found' or can't access data
If Claude reports that you don’t have any data layers:
- Complete the quickstart to create the demo data layer first
- Verify you can see your data layer at app.astrobee.ai
- Make sure you’re using the same AstroBee account in both Claude Desktop and the web app
- Check that your data layer has completed generation and is not in a pending state
Authorization popup doesn't open
Authorization popup doesn't open