The Data Hub is your central location for managing all data connections in AstroBee. Upload files, connect external tools, and explore your data before building a data layer.
Accessing the Data Hub Click Data Sources in the sidebar to open the Data Hub.
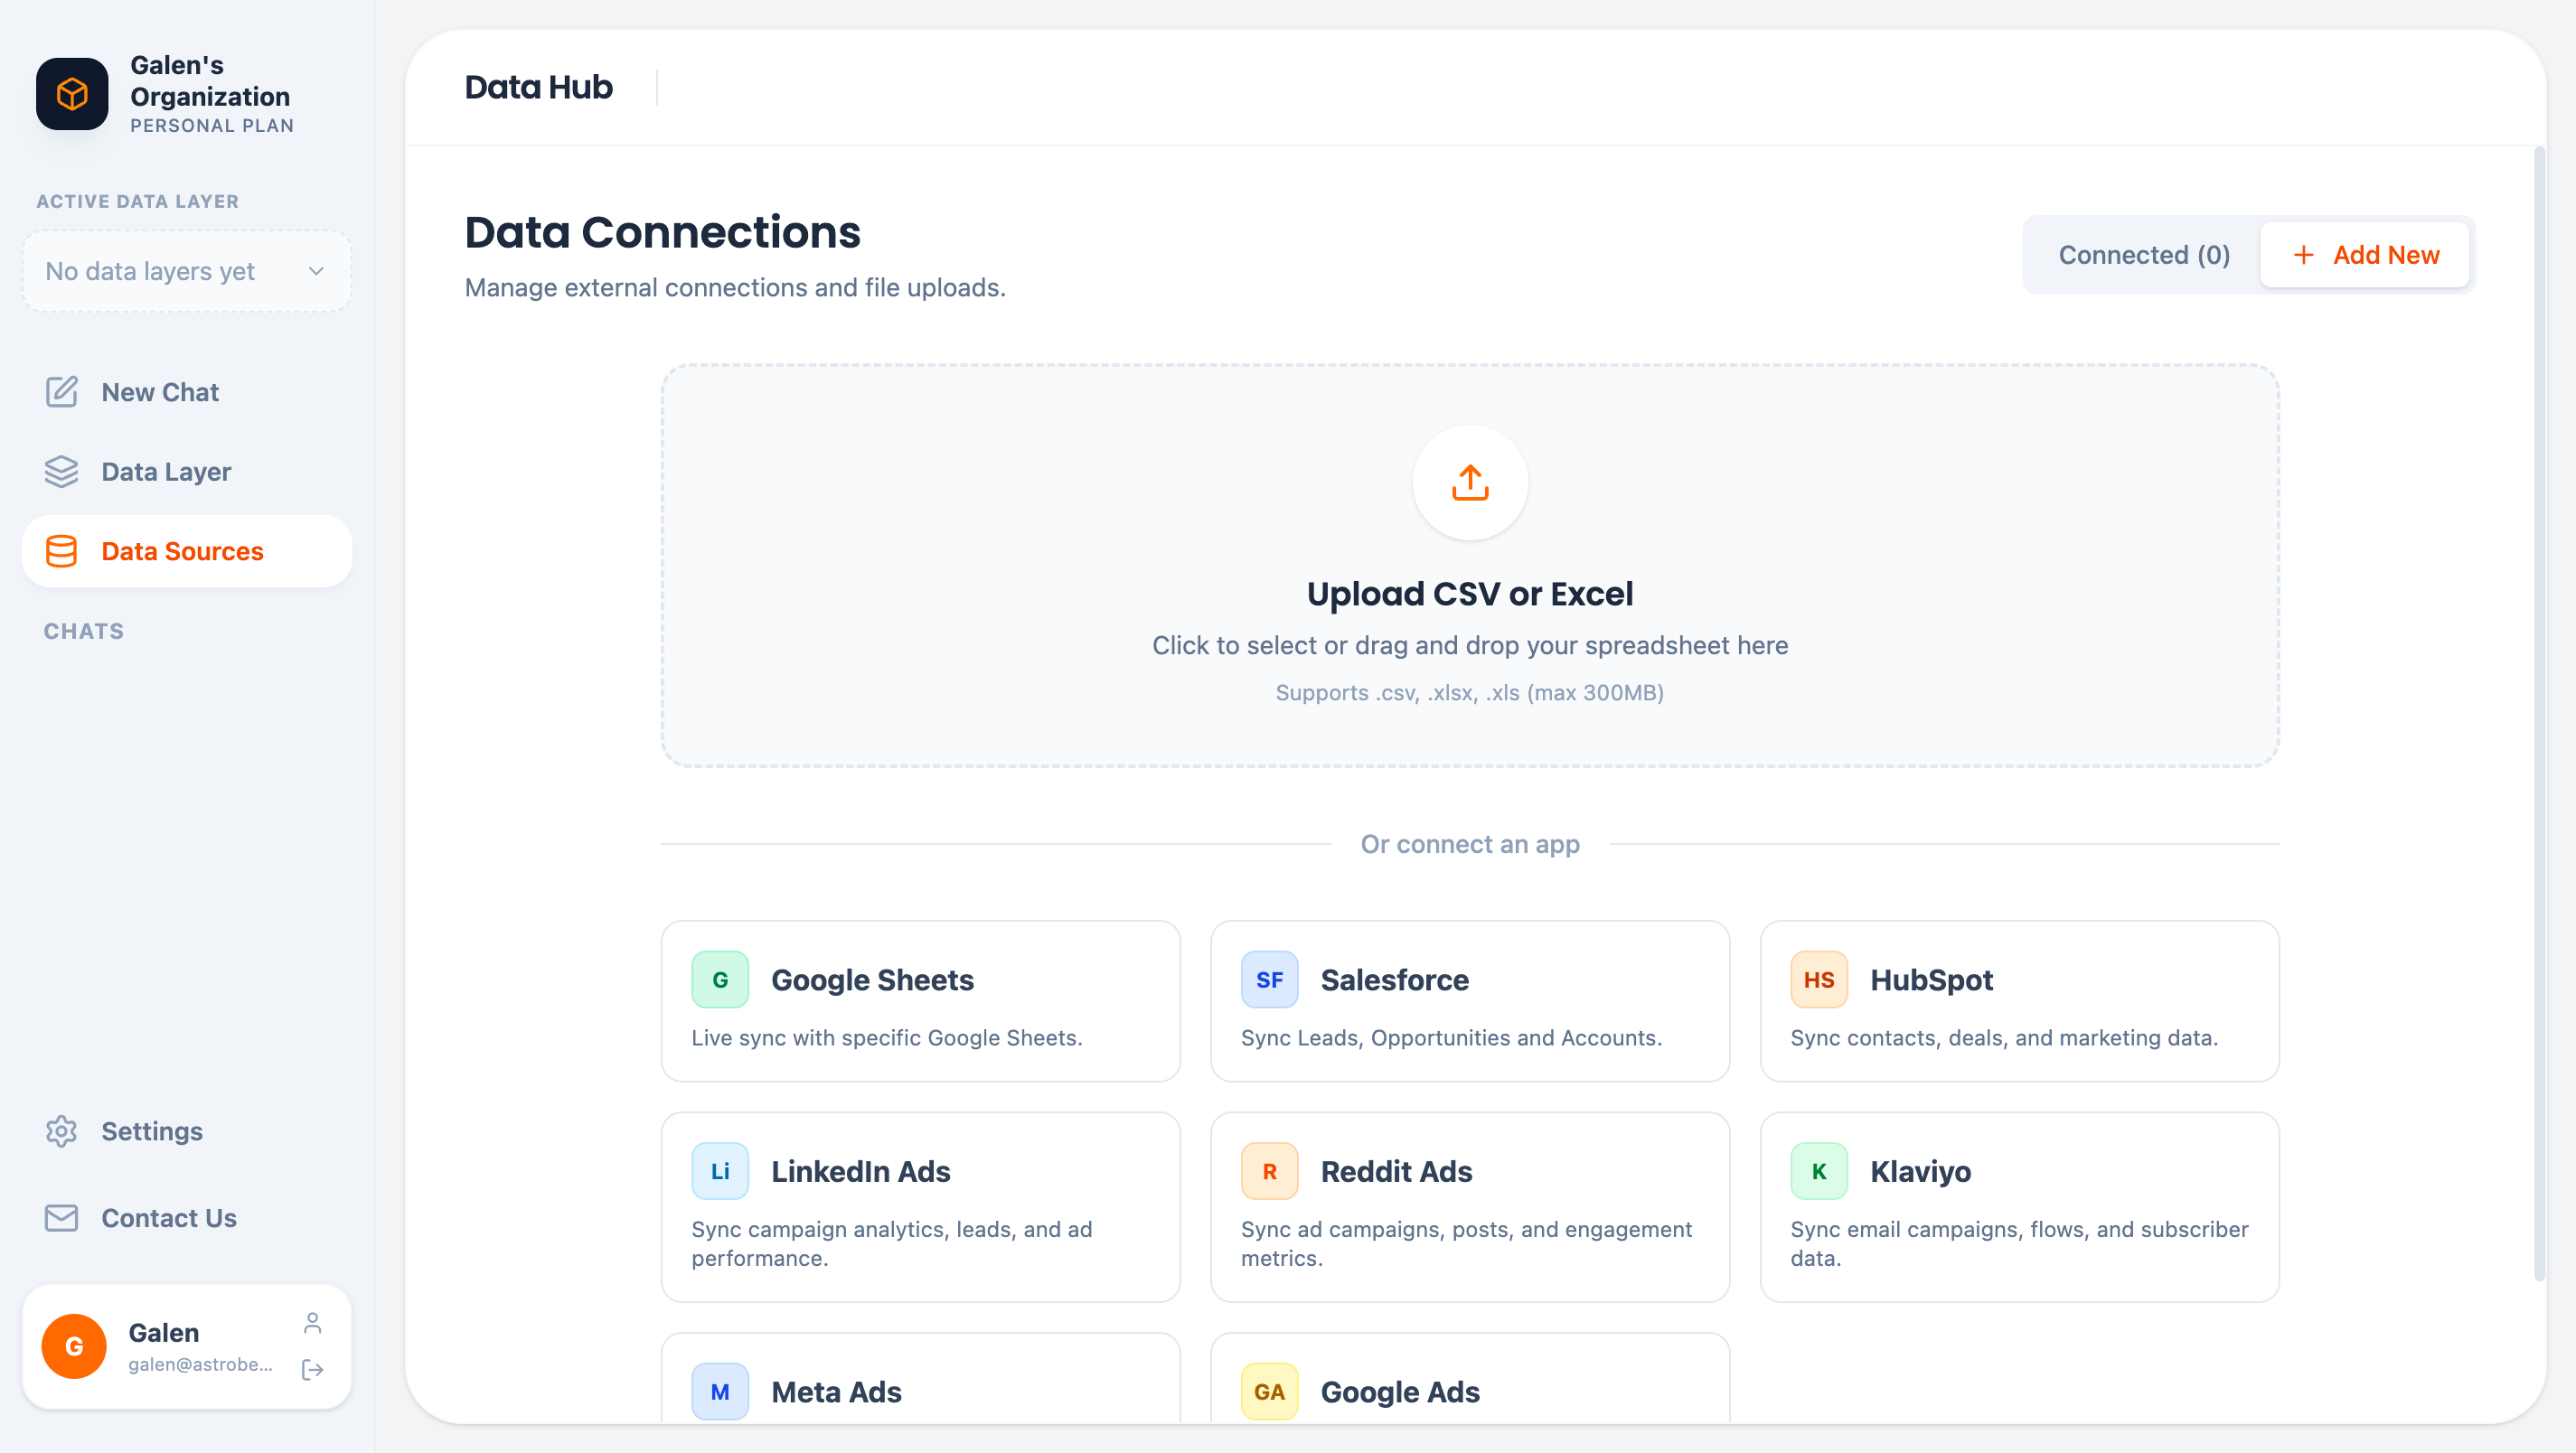
Adding Data Sources Click Add New to see all available connection options:
File Uploads Upload spreadsheets directly:
Format Max Size Features CSV 300 MB Automatic type detection Excel (.xlsx, .xls) 300 MB Multiple sheets supported
Drag and drop files or click to browse.
External Connectors Connect business tools via secure Fivetran integration:
Connector Data Types Google Sheets Live sync with specific sheets Salesforce Leads, Opportunities, Accounts HubSpot Contacts, Deals, Marketing data LinkedIn Ads Campaign analytics, Ad performance Reddit Ads Campaigns, Posts, Engagement metrics Klaviyo Email campaigns, Flows, Subscribers Meta Ads Campaigns, Audiences, Performance Google Ads Campaigns, Ad groups, Conversions
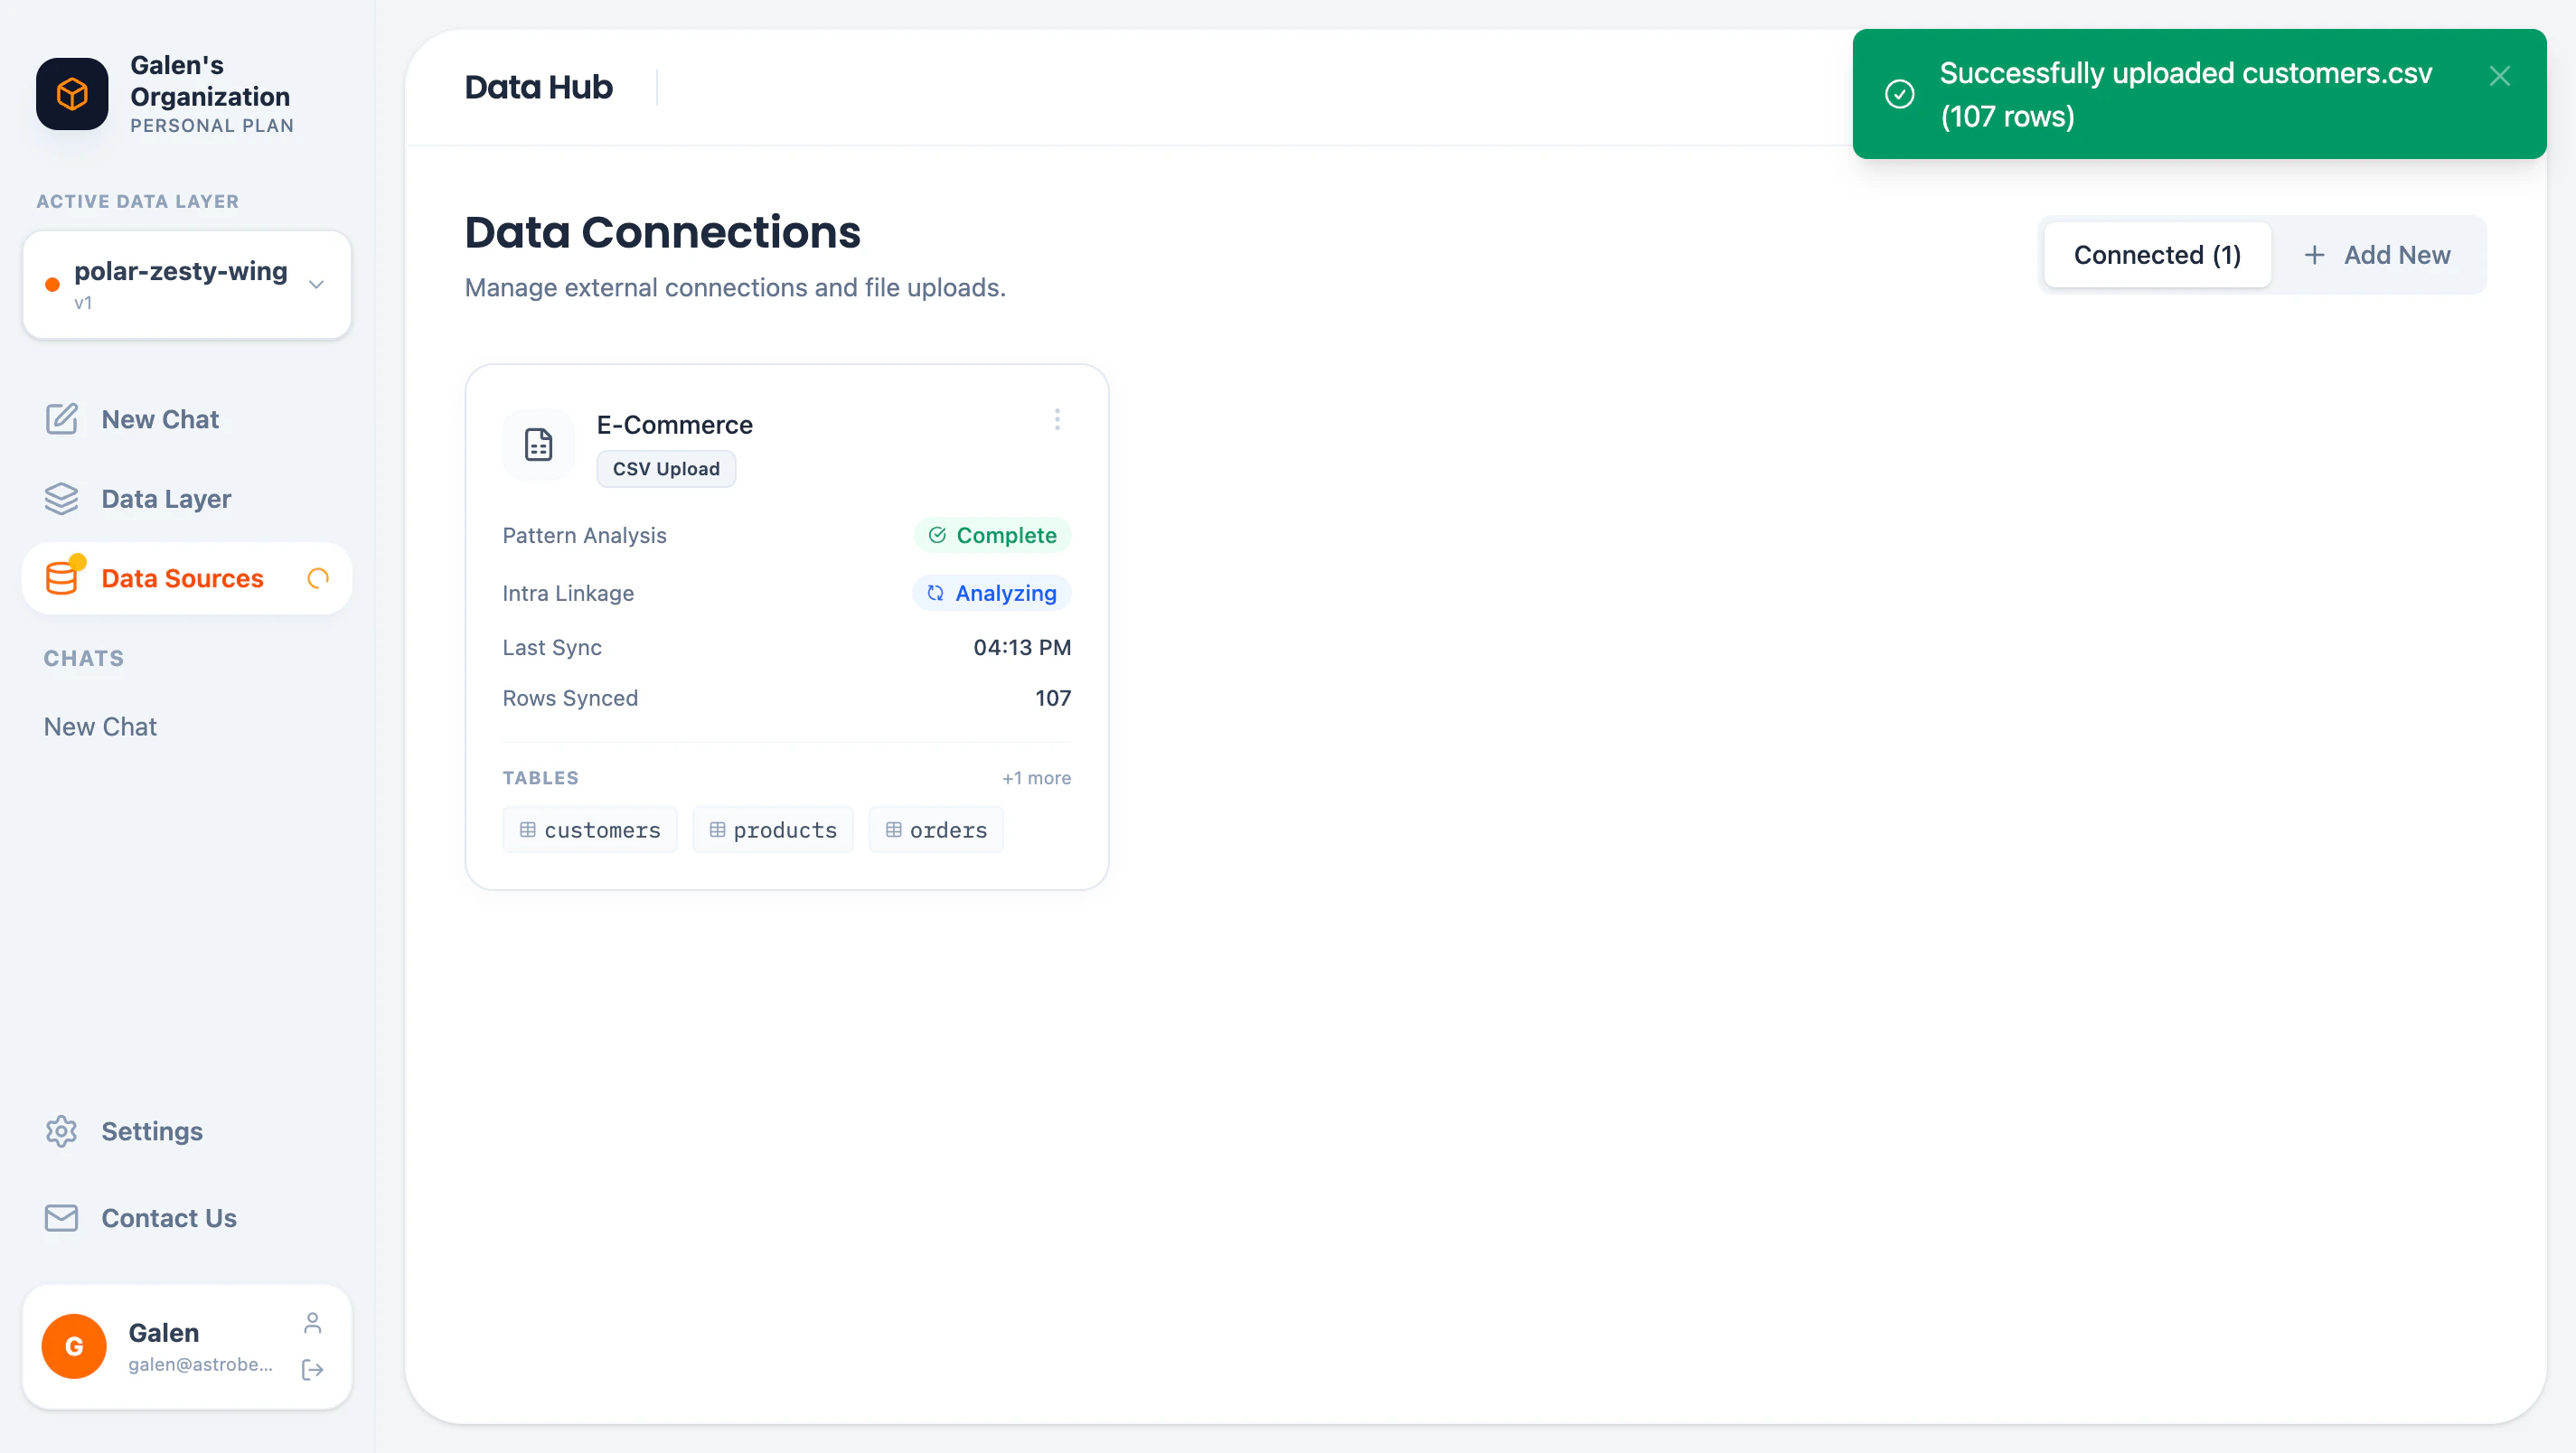
External connections use Fivetran , a SOC 2 certified data integration platform. Your credentials are encrypted and never stored by AstroBee. Data Source Cards Each connected source shows a card with key information:
Field Description Name Editable display name Type CSV Upload or connector name Pattern Analysis Status of column pattern discovery Intra Linkage Status of relationship discovery Last Sync When data was last updated Rows Synced Total row count Tables Available tables in this source
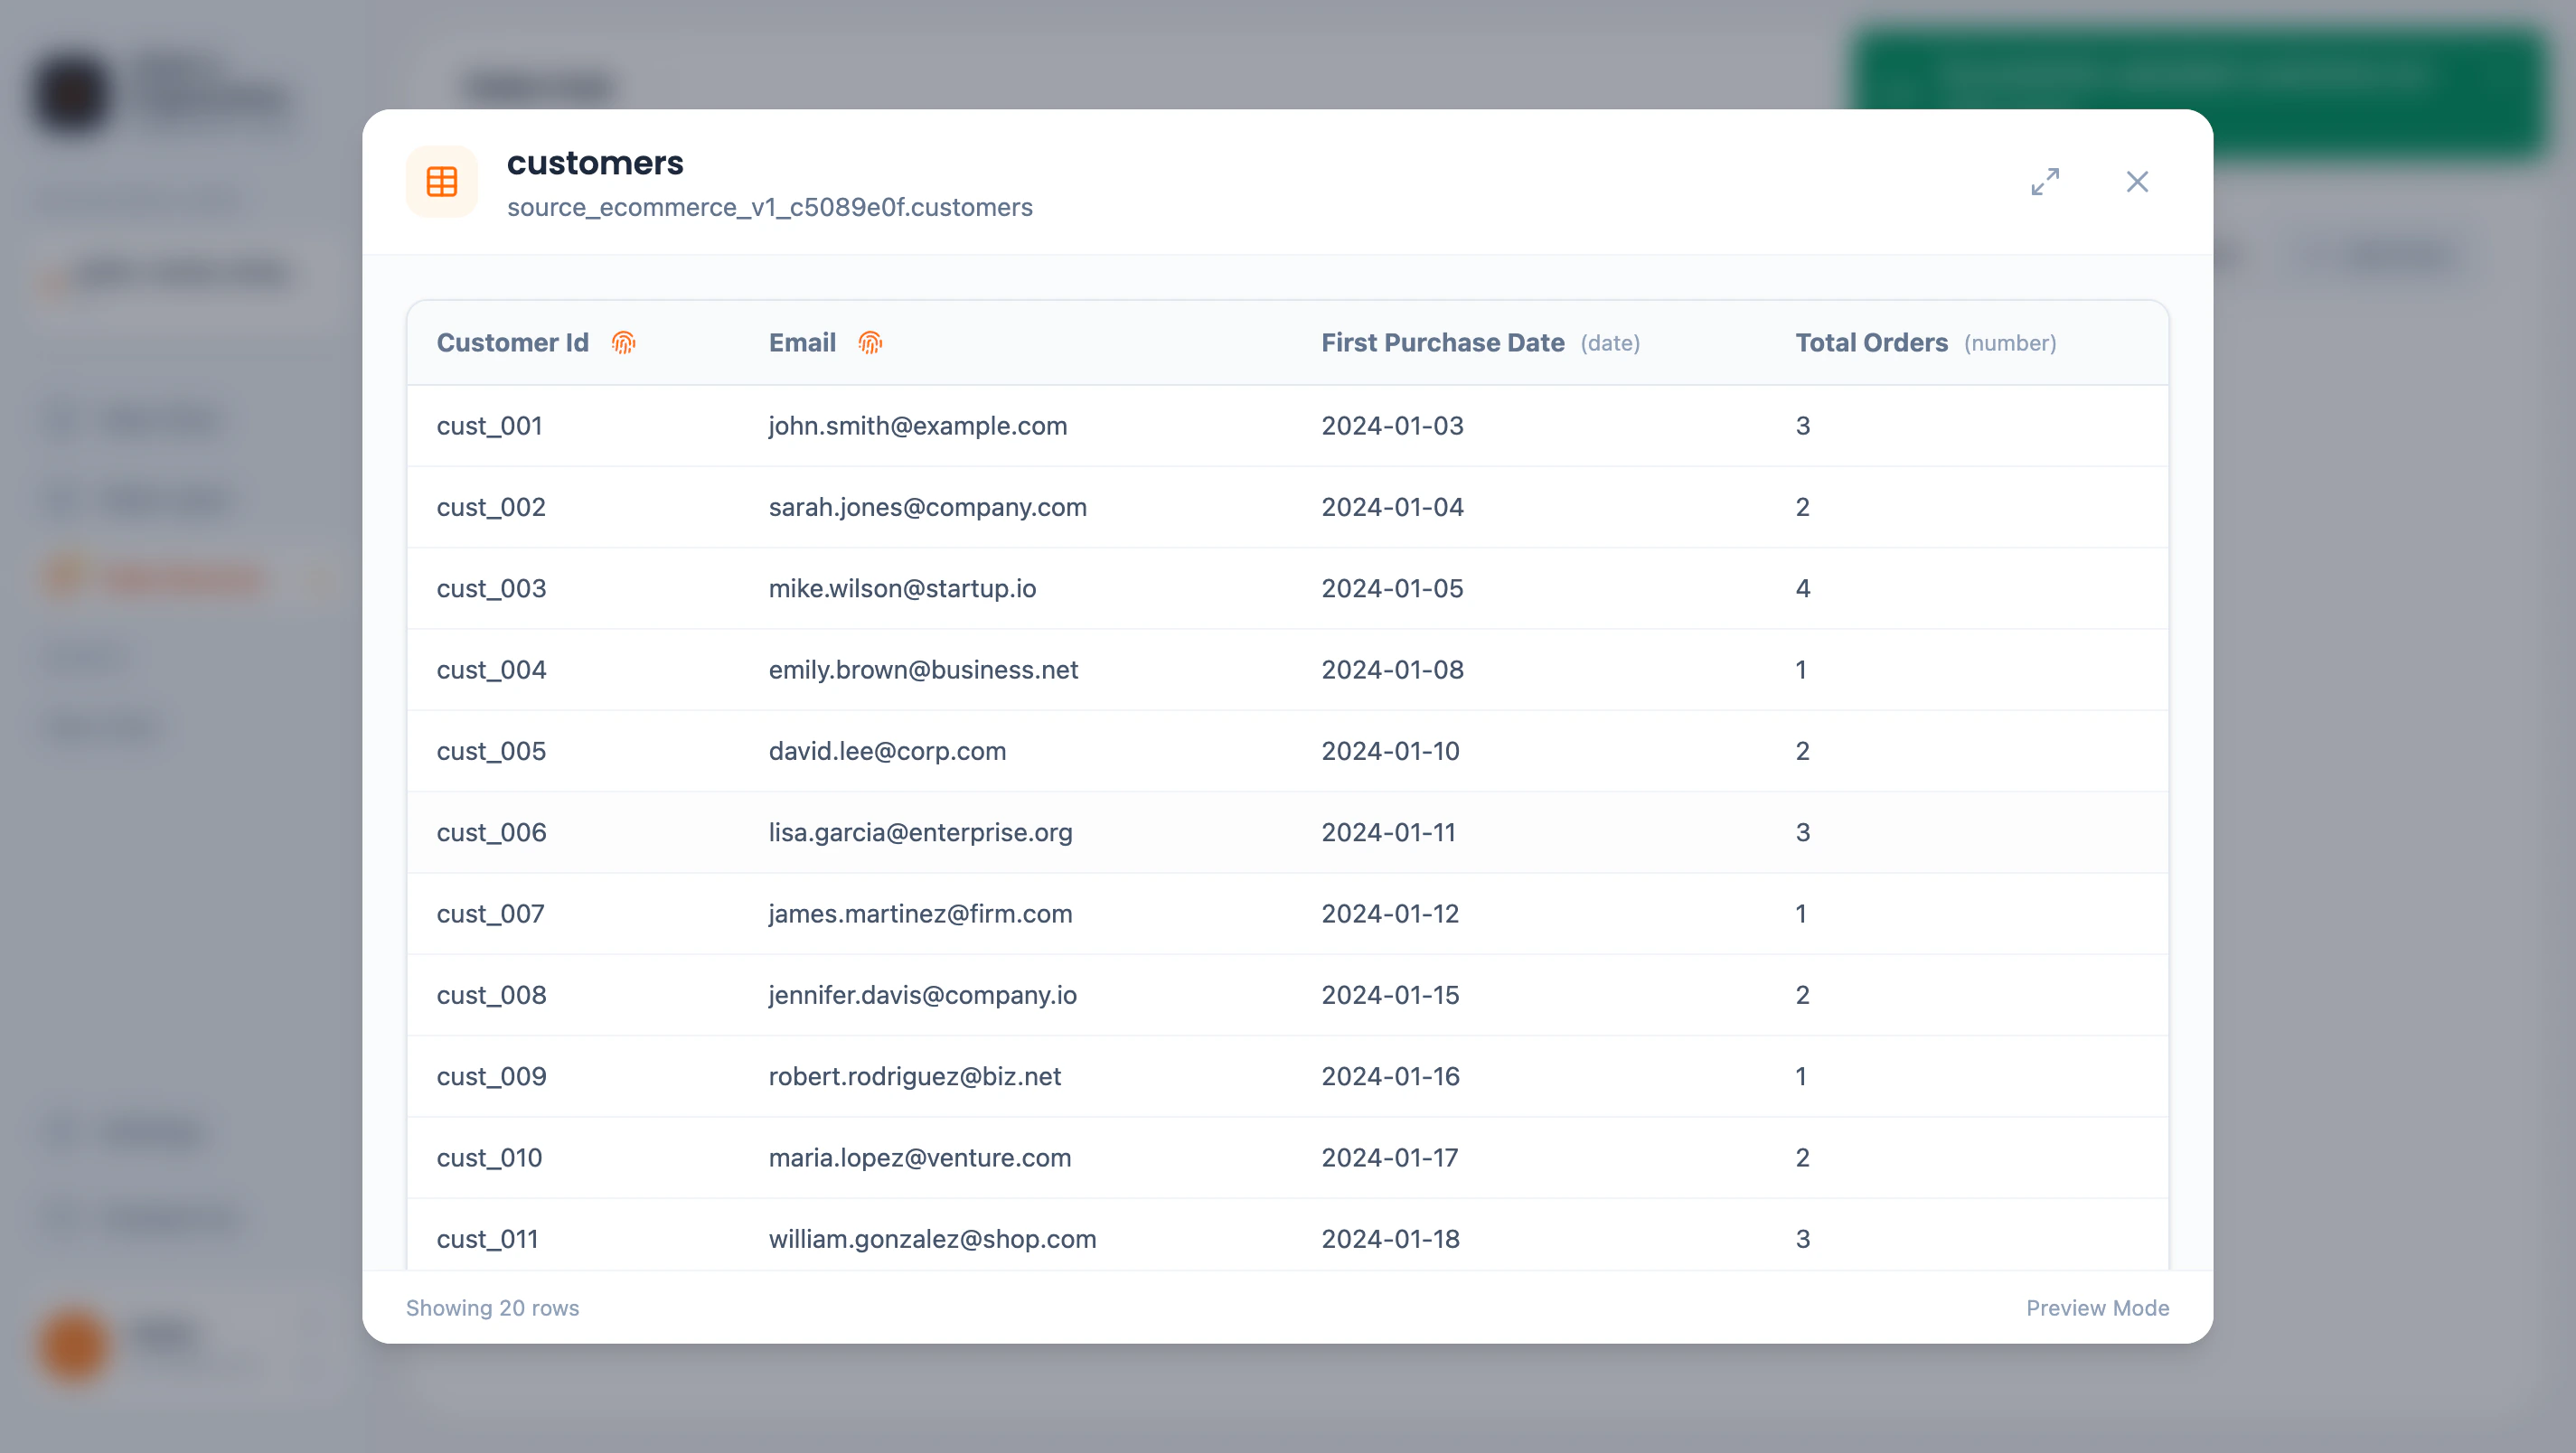
Exploring Tables Click a table name to preview its data:
The preview shows:
Column names with data types
Sample data (up to 20 rows)
Pattern analysis buttons for each column
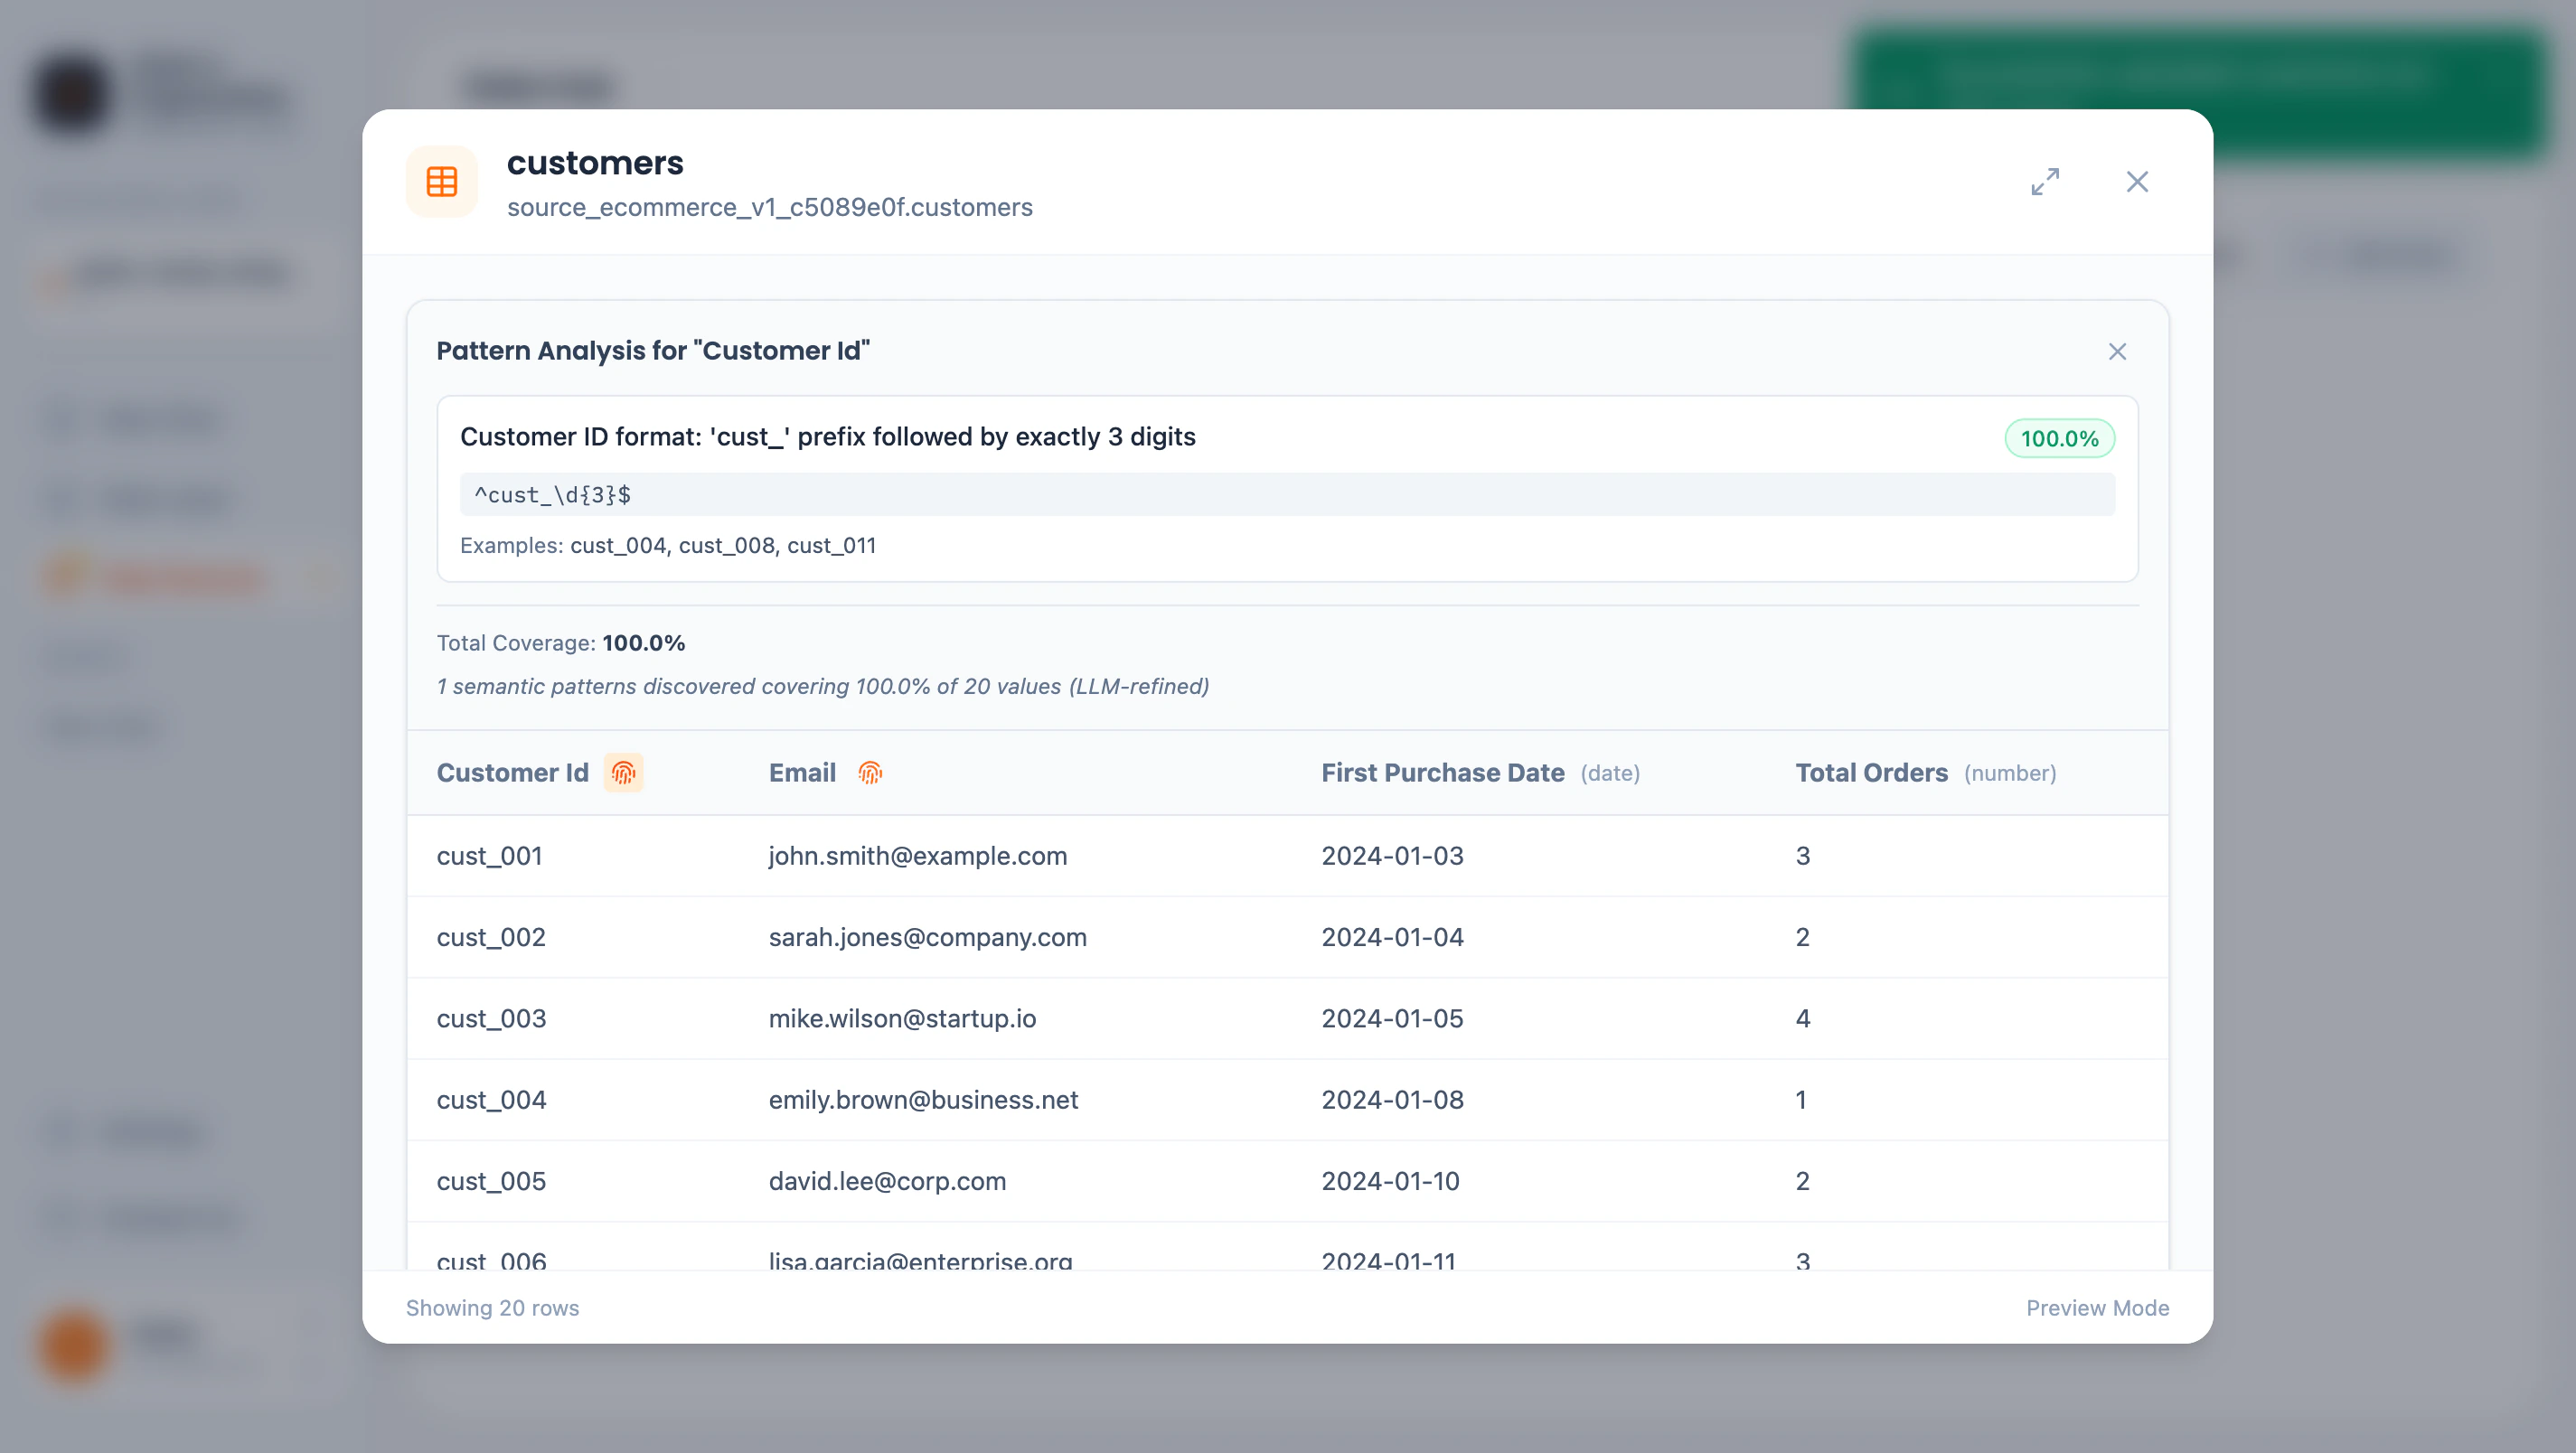
Pattern Analysis AstroBee automatically analyzes columns to discover patterns:
Pattern details include:
Description — Human-readable pattern explanationCoverage — Percentage of values matching the patternRegex — Technical pattern definitionExamples — Sample values matching the pattern
Patterns help AstroBee:
Understand data semantics (IDs, emails, dates)
Suggest appropriate entity mappings
Discover relationships between tables
Linkage Discovery AstroBee automatically discovers relationships between tables within a data source:
Key references — Foreign key relationships (e.g., orders.customer_id → customers.customer_id)Pattern matches — Columns with matching patterns across tables
View discovered linkages in the Data Layer → Linkages tab.
Managing Data Sources Renaming Click the data source name to rename it. Names help identify sources when connecting to data layers.
Syncing External connectors sync automatically based on your Fivetran configuration. File uploads are one-time imports.
To update file data:
Upload a new version of the file
The existing source is replaced
Deleting Click the menu button (⋮) on a data source card to delete it.
Deleting a data source removes its data from AstroBee. Data layers using this source will lose access to its tables.
Demo Data New accounts can load demo datasets to explore AstroBee:
Demo Contents Basic E-Commerce Customers, Products, Orders (1 source) Complete E-Commerce Full e-commerce with marketing data (2 sources)
Demo data is great for learning the platform before connecting your own data.
Next Steps
Build a Data Layer Create entities and relationships from your data
Connector Guides Step-by-step guides for each connector