Overview
A data layer consists of:- Entities — Business concepts like Customer, Product, or Order
- Properties — Attributes of entities (e.g., Customer.email, Product.price)
- Relationships — How entities connect (e.g., Customer → Order)

Accessing the Data Layer
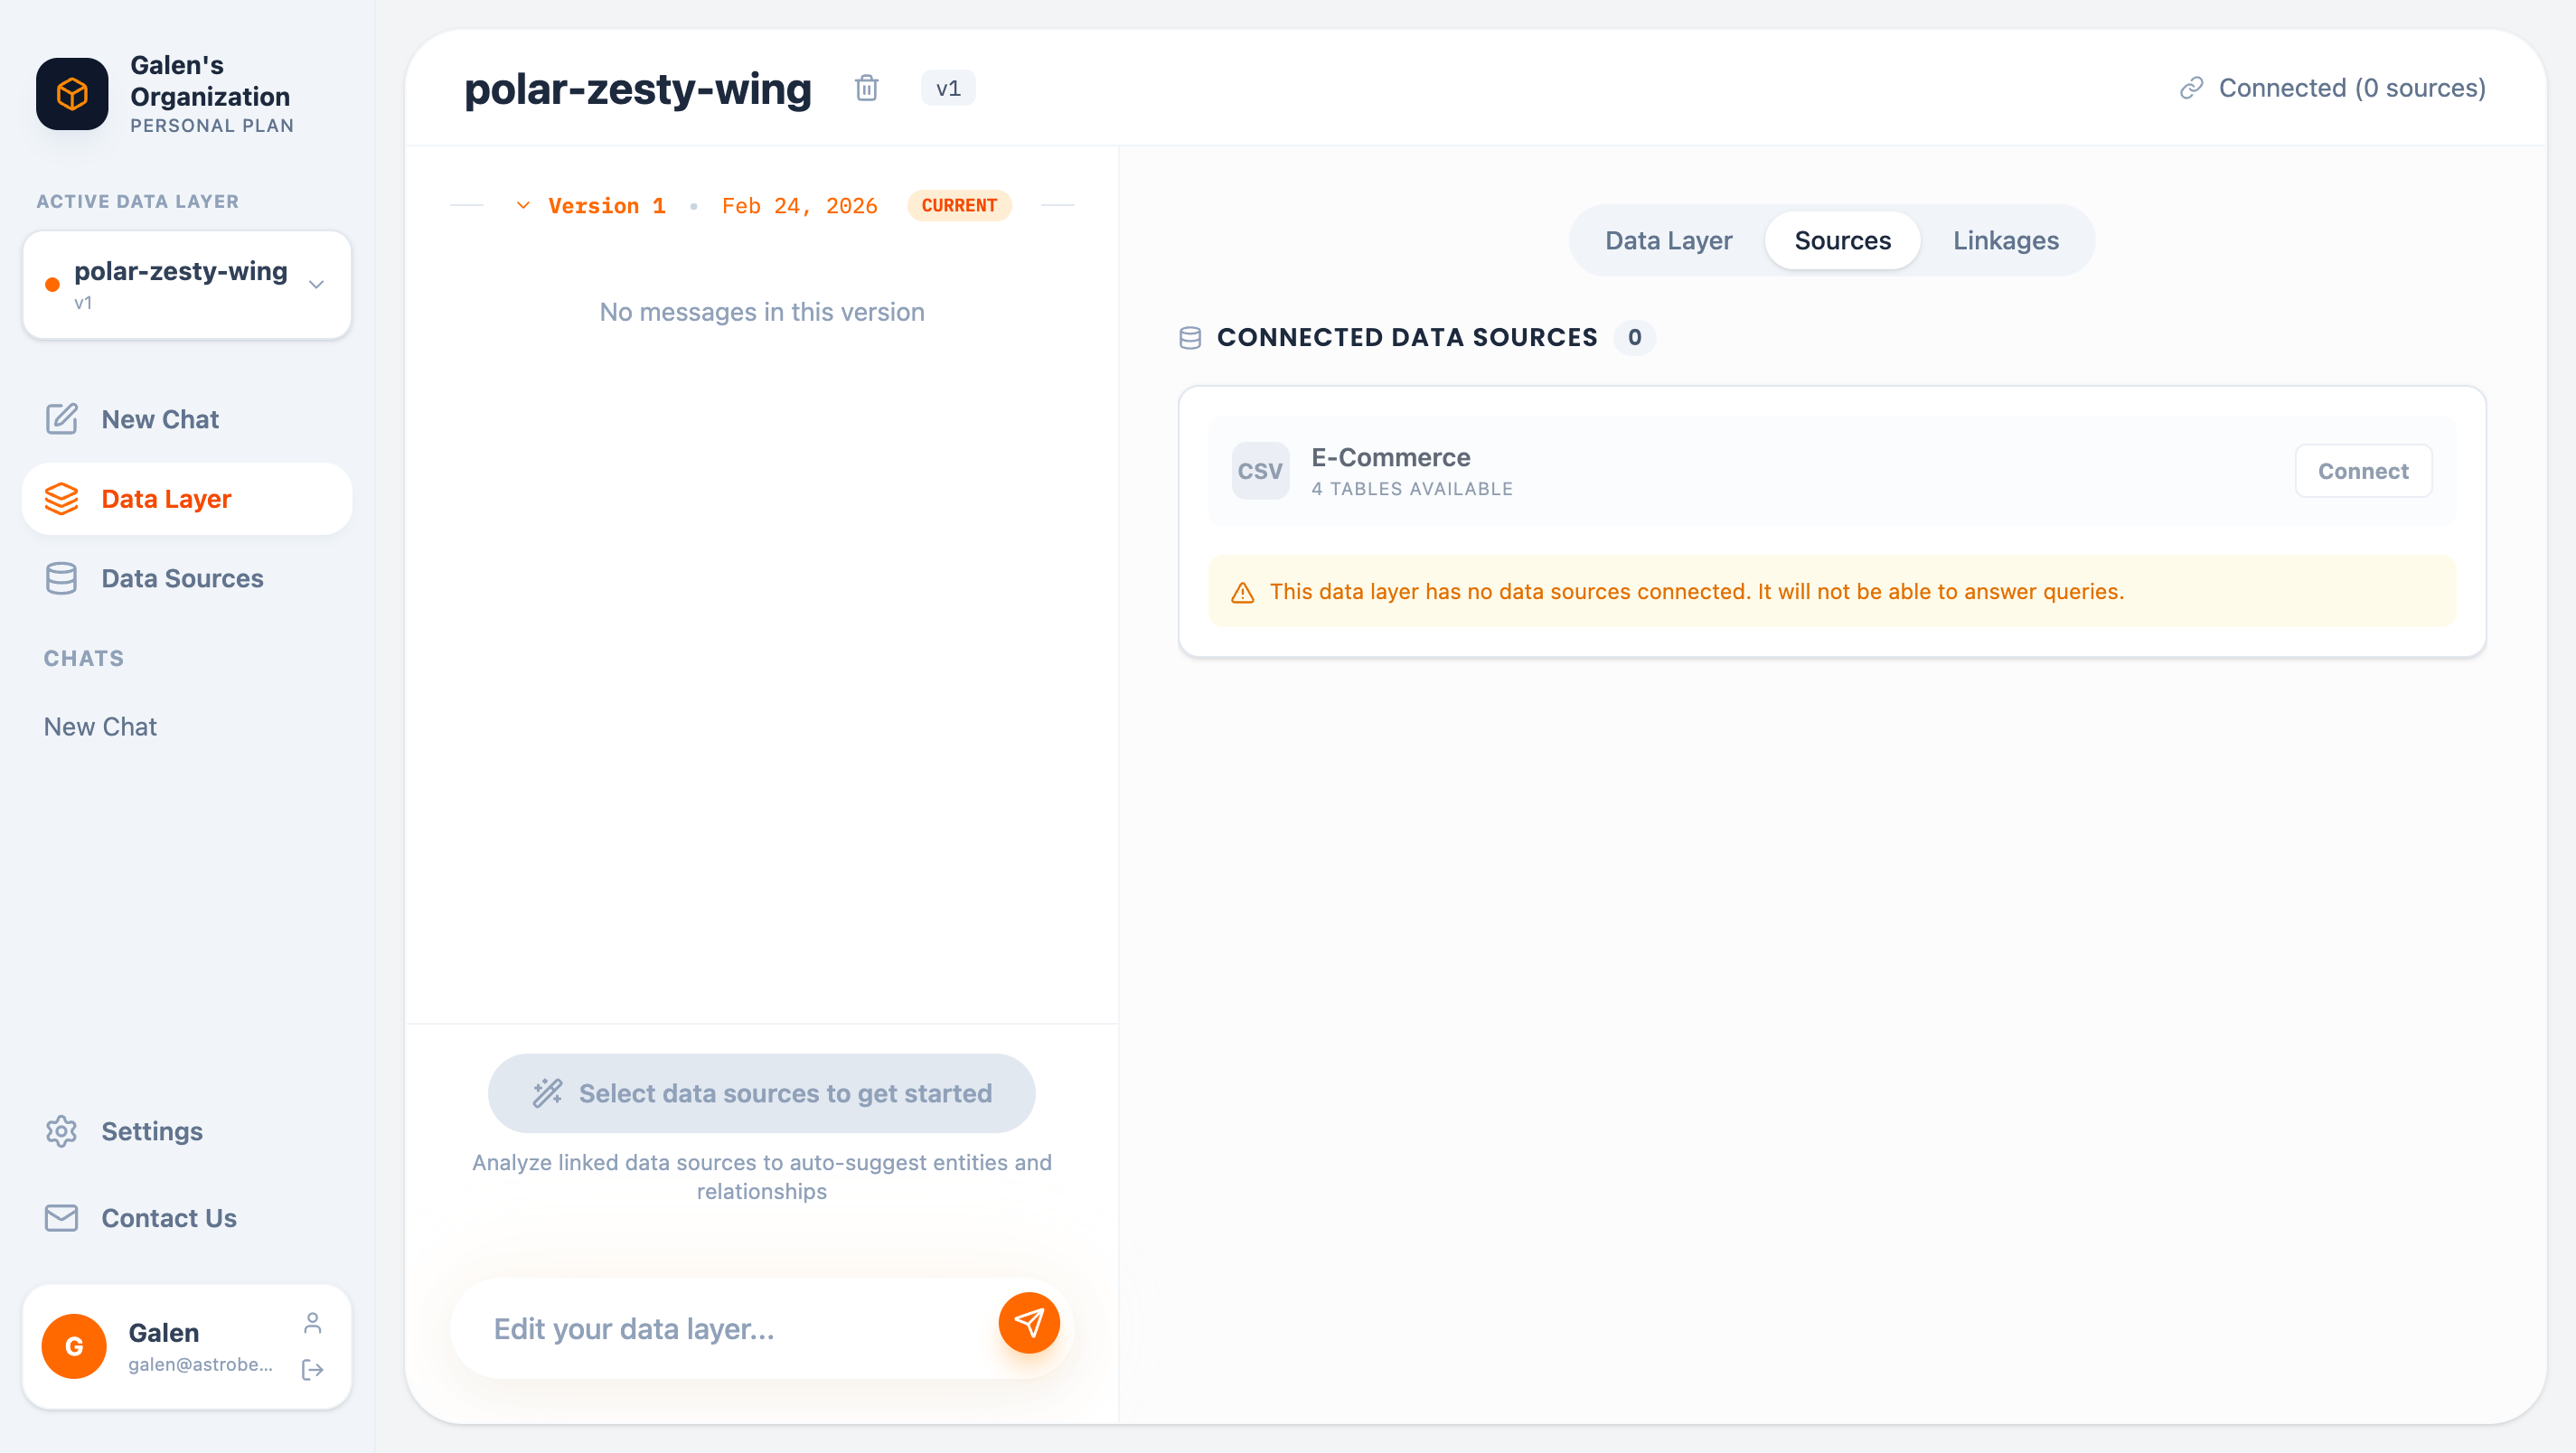
Click Data Layer in the sidebar to open the editor. The editor has three main tabs:| Tab | Purpose |
|---|---|
| Data Layer | View and edit entities in Graph or List view |
| Sources | Connect data sources to your data layer |
| Linkages | View discovered relationships between tables |
Generating a Data Layer
Connect Sources First
Before generating, connect at least one data source:- Click the Sources tab
- Find available data sources
- Click Connect to link them to this data layer
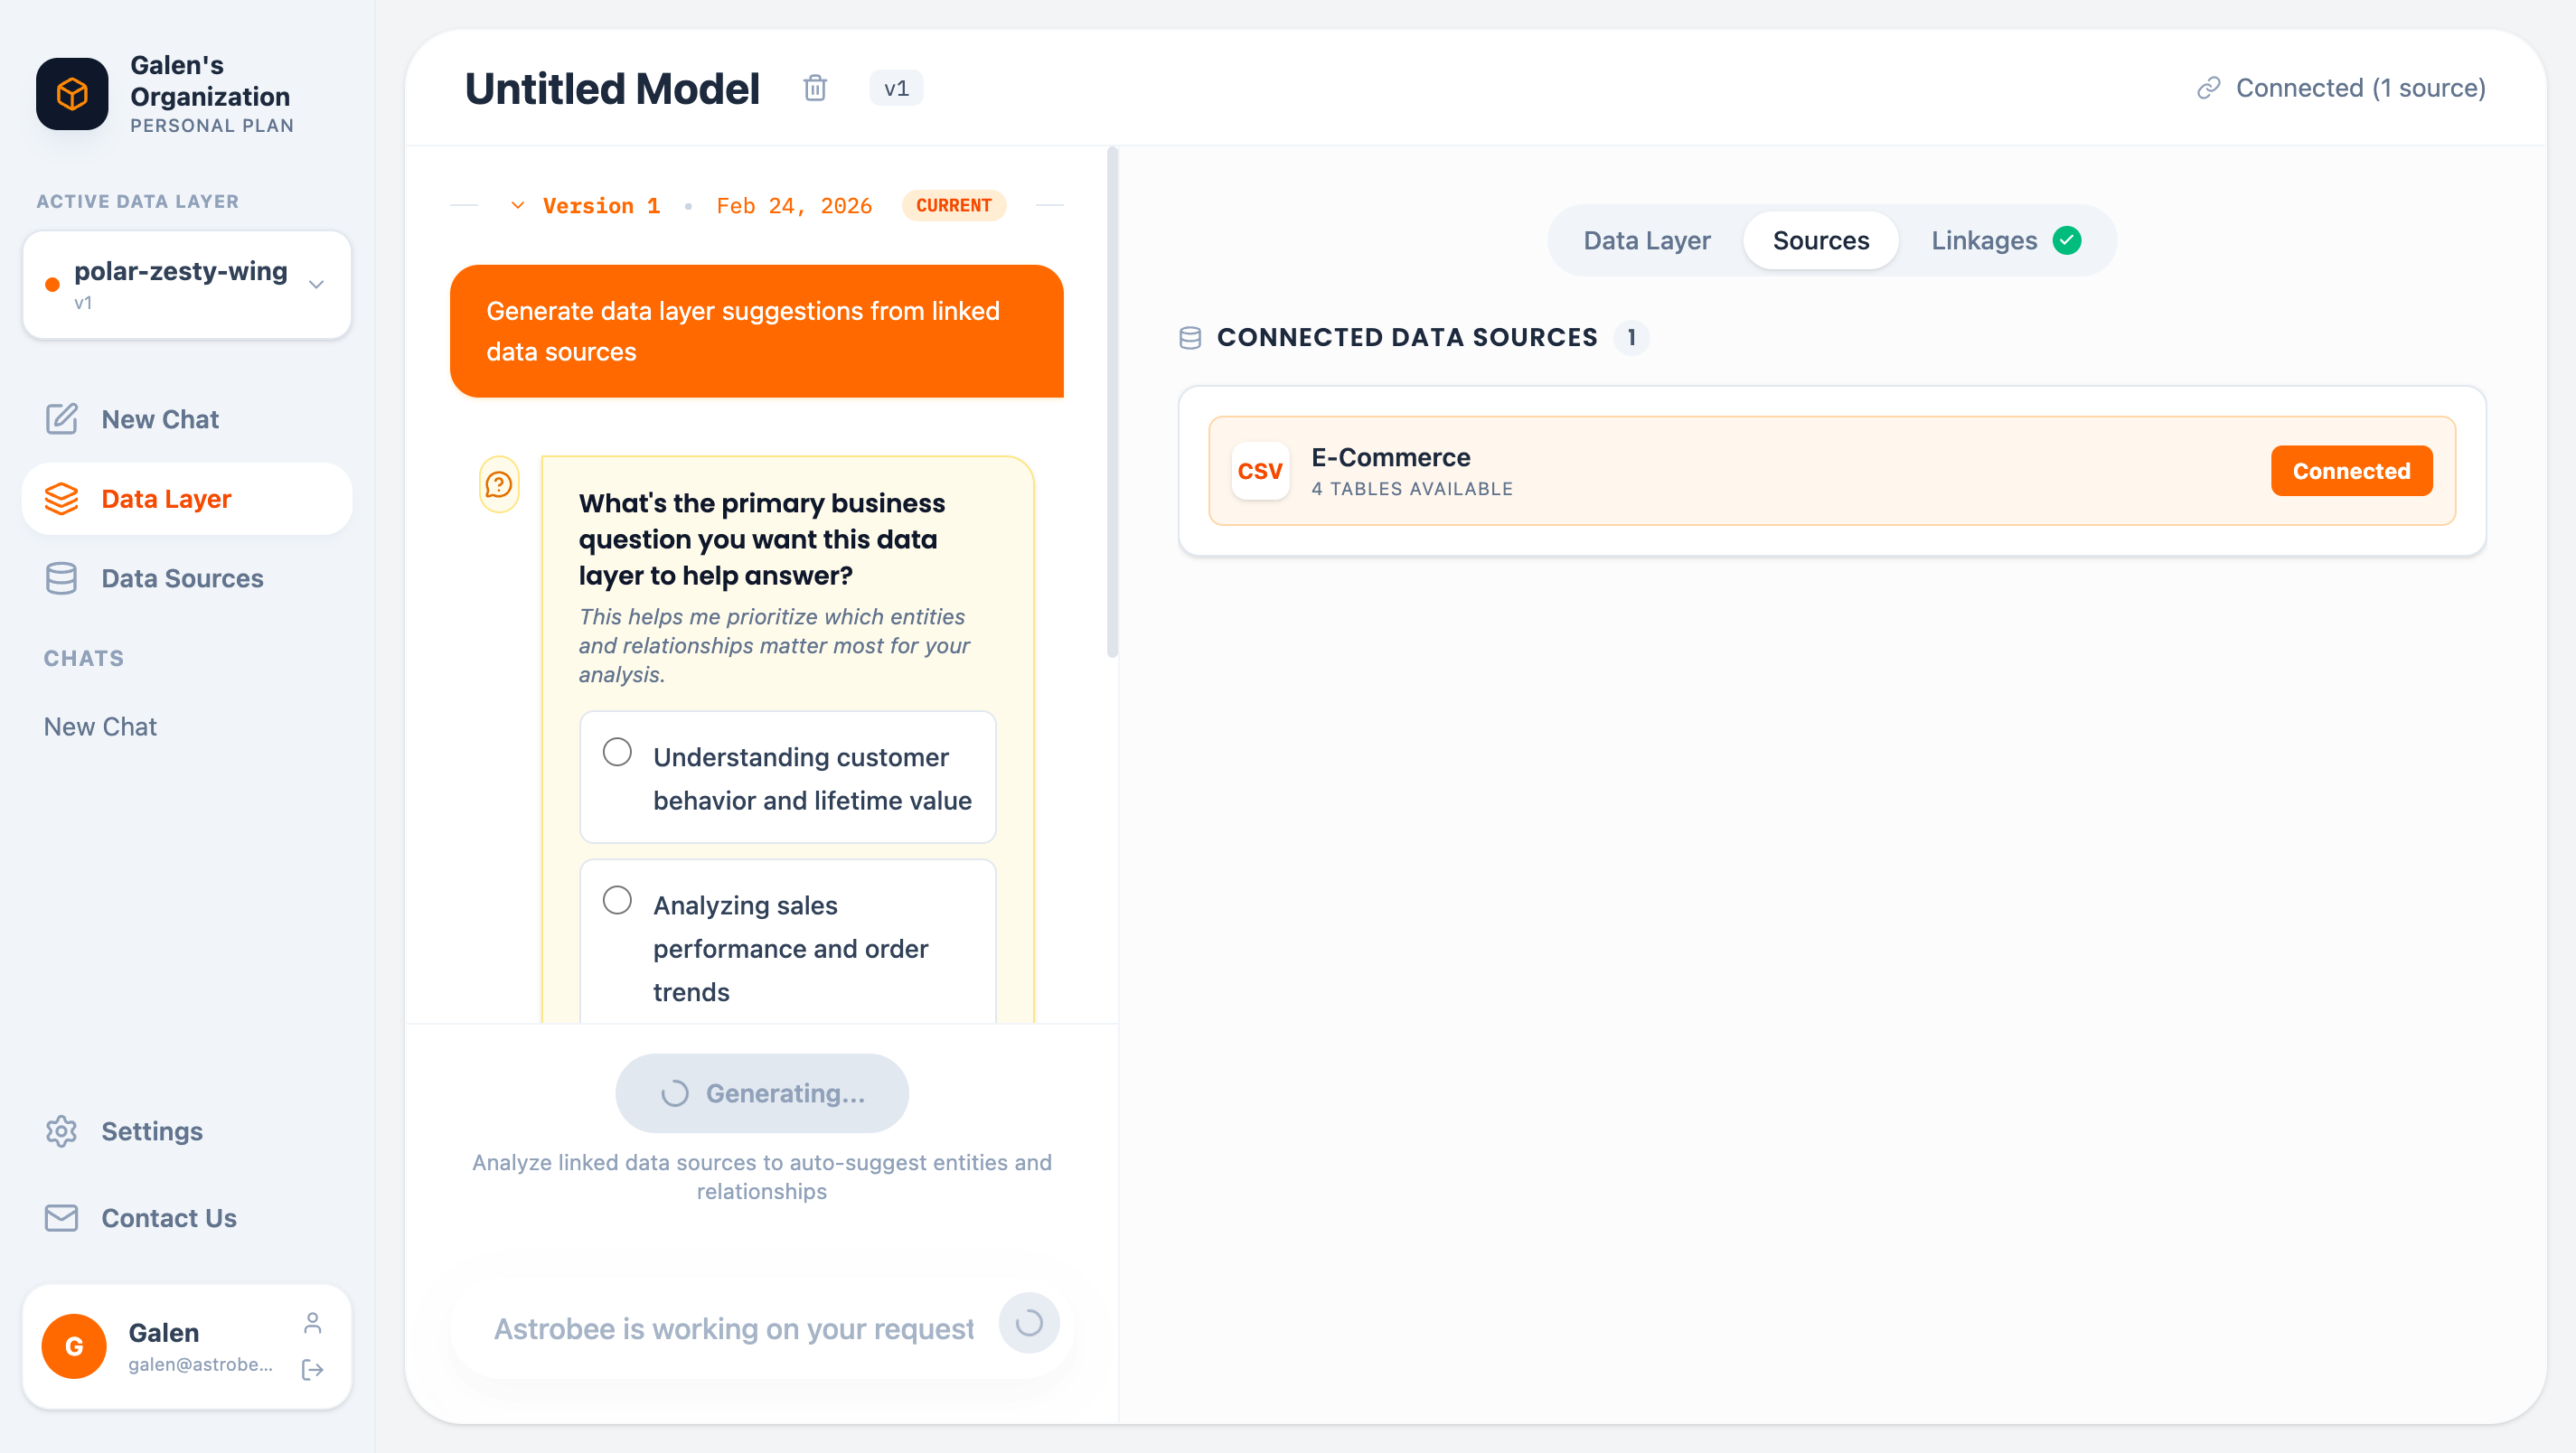
AI-Assisted Generation
Click Generate Data Layer from selected Sources to start the AI-assisted workflow:- Business Questions — AstroBee asks what you want to analyze (customer behavior, sales performance, etc.)
- Terminology — Define your business language (orders vs. sales vs. transactions)
- Generation — AI analyzes your data and creates entities with proper bindings
- Discover tables and columns in your data sources
- Match entities to tables by name similarity
- Map properties to columns based on data types and meanings
- Create relationships based on discovered linkages
Viewing Your Data Layer
Graph View
The default view shows entities as nodes and relationships as edges:- Nodes represent entities (dimension, fact, or bridge types)
- Edges show relationships with cardinality (1:N, N:N)
- Click Expand to fullscreen for a larger view
List View
Click List View for a detailed breakdown: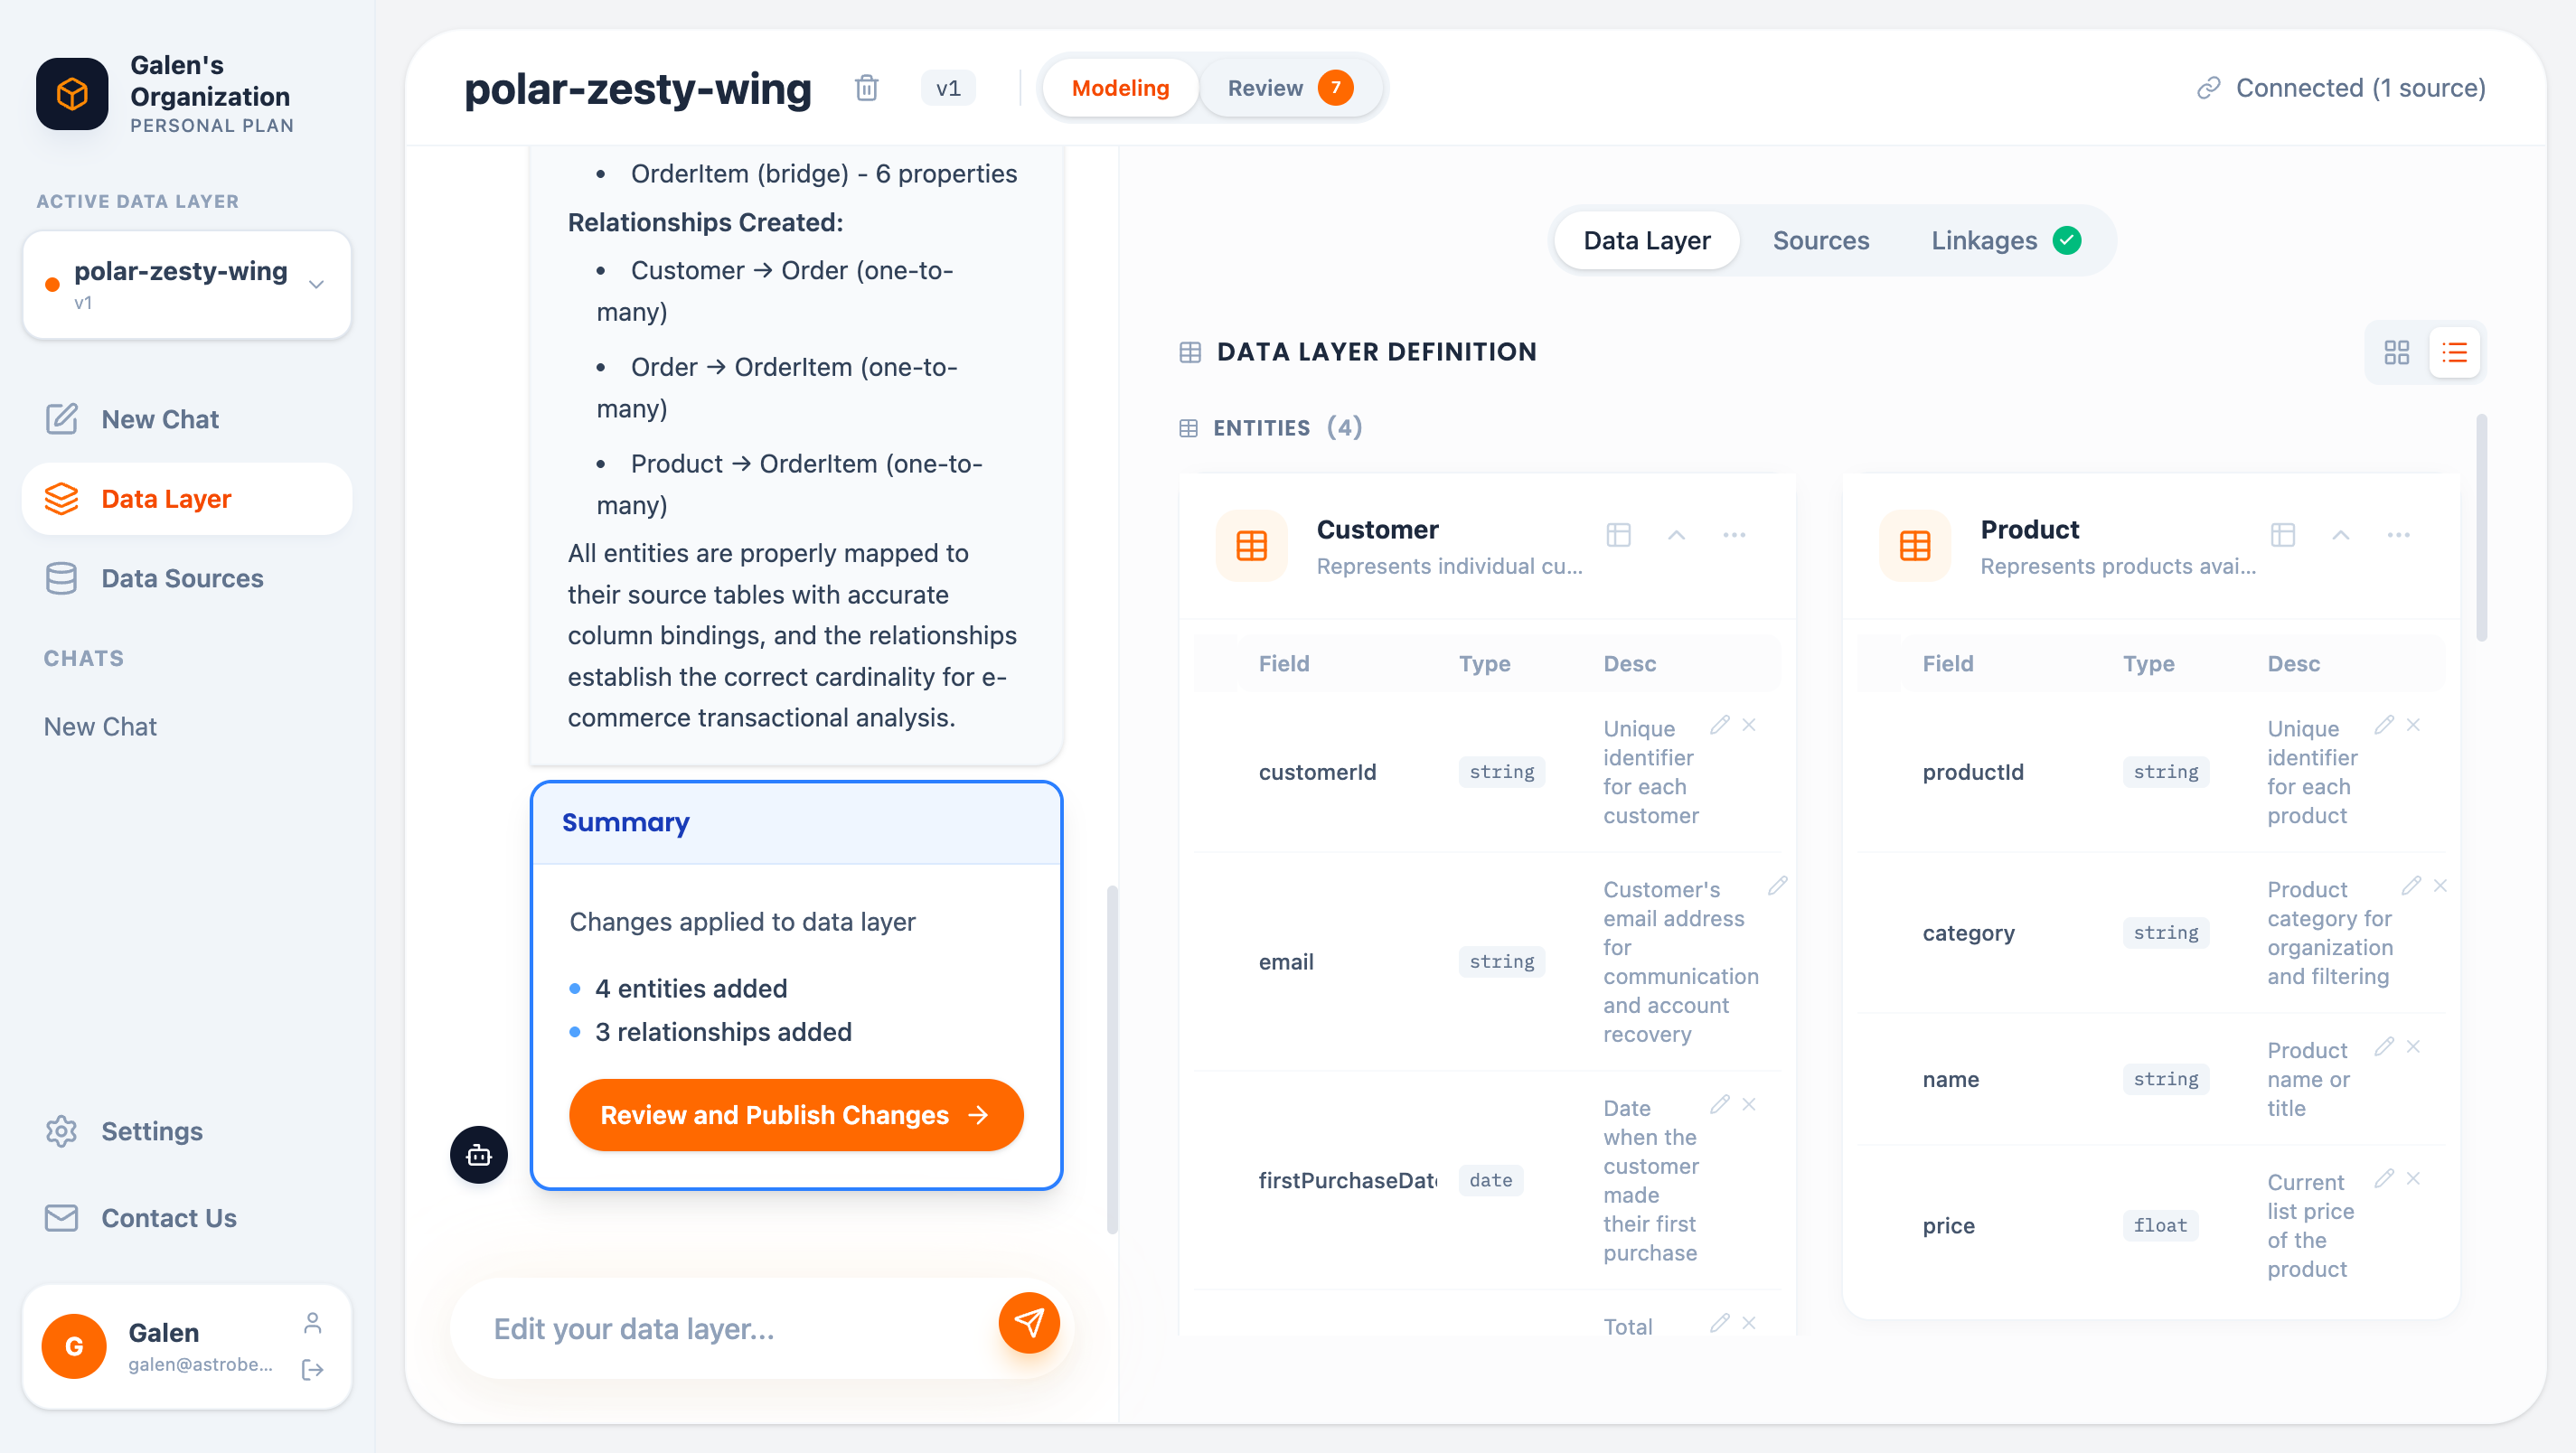
- Entity names and descriptions
- All properties with types (Dimension/Measure) and data types
- Field descriptions
- Relationships with join conditions
Editing Your Data Layer
Chat-Based Editing
Use the chat input at the bottom to make changes in natural language:Direct Editing
In List View, click on any element to edit directly:- Click entity names to rename
- Click descriptions to update
- Click properties to modify types or descriptions
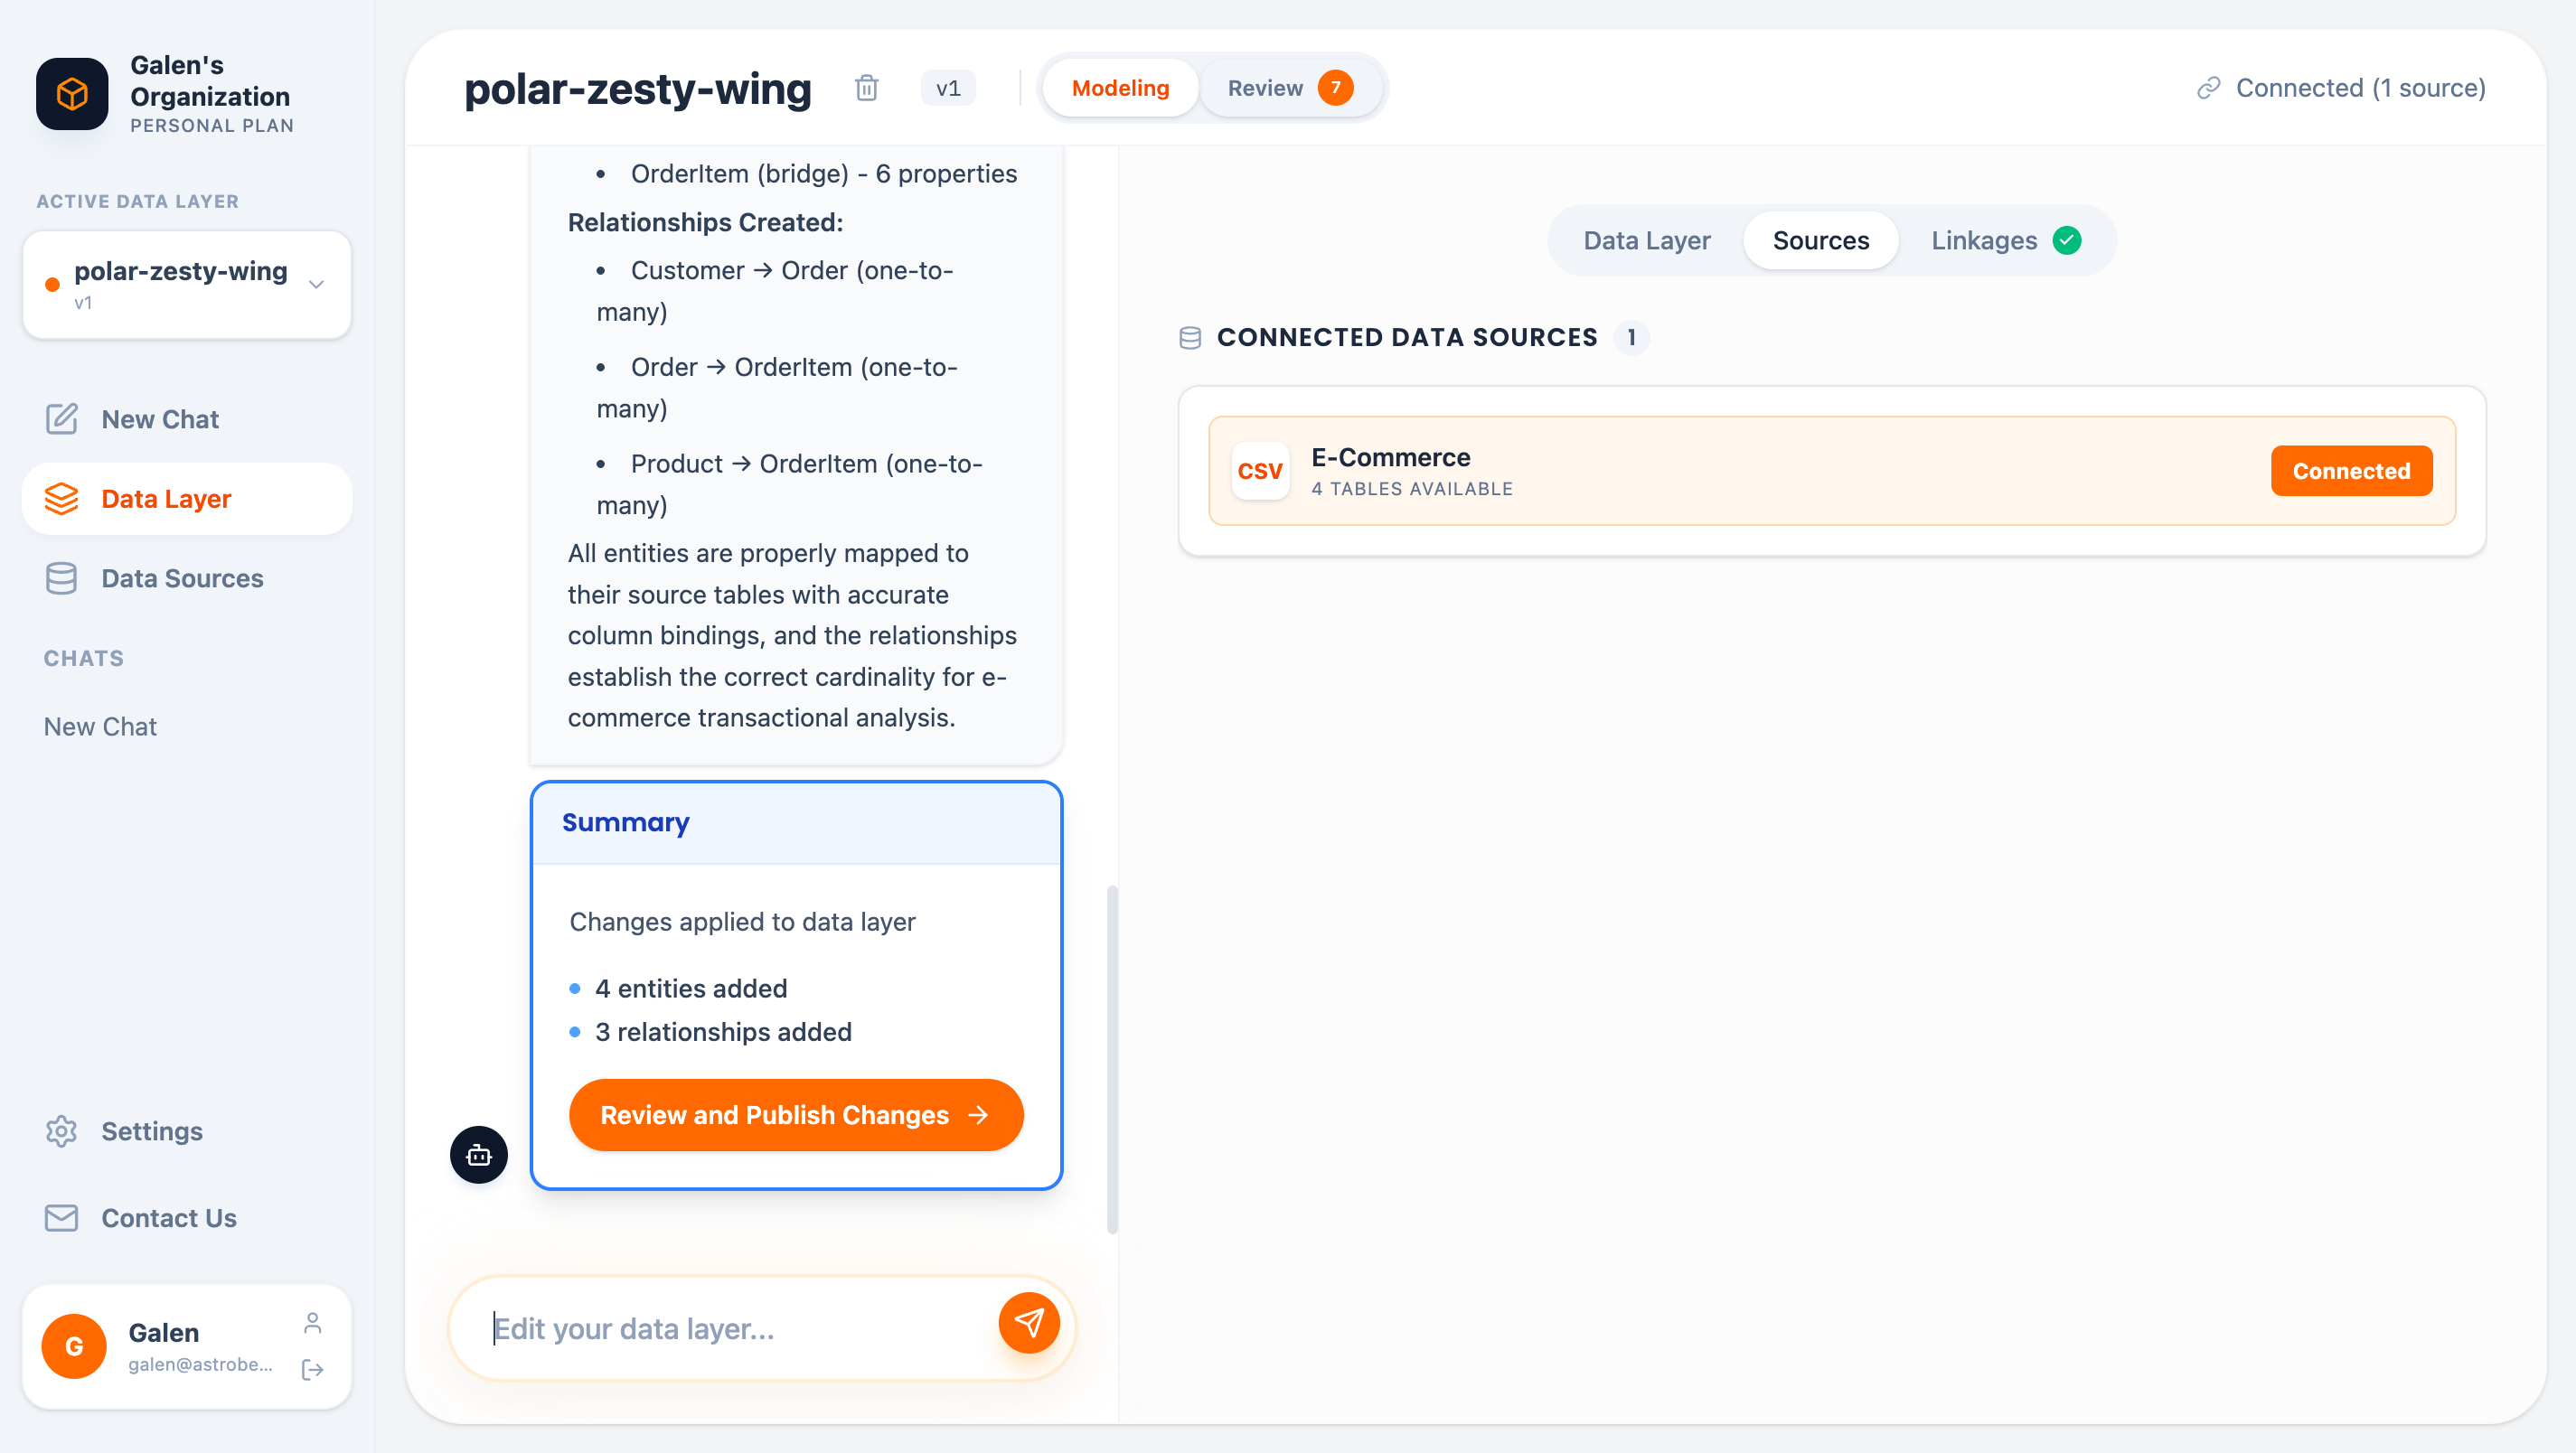
Reviewing Changes
All changes go to a scratchpad before being published. Click the Review button to see pending changes: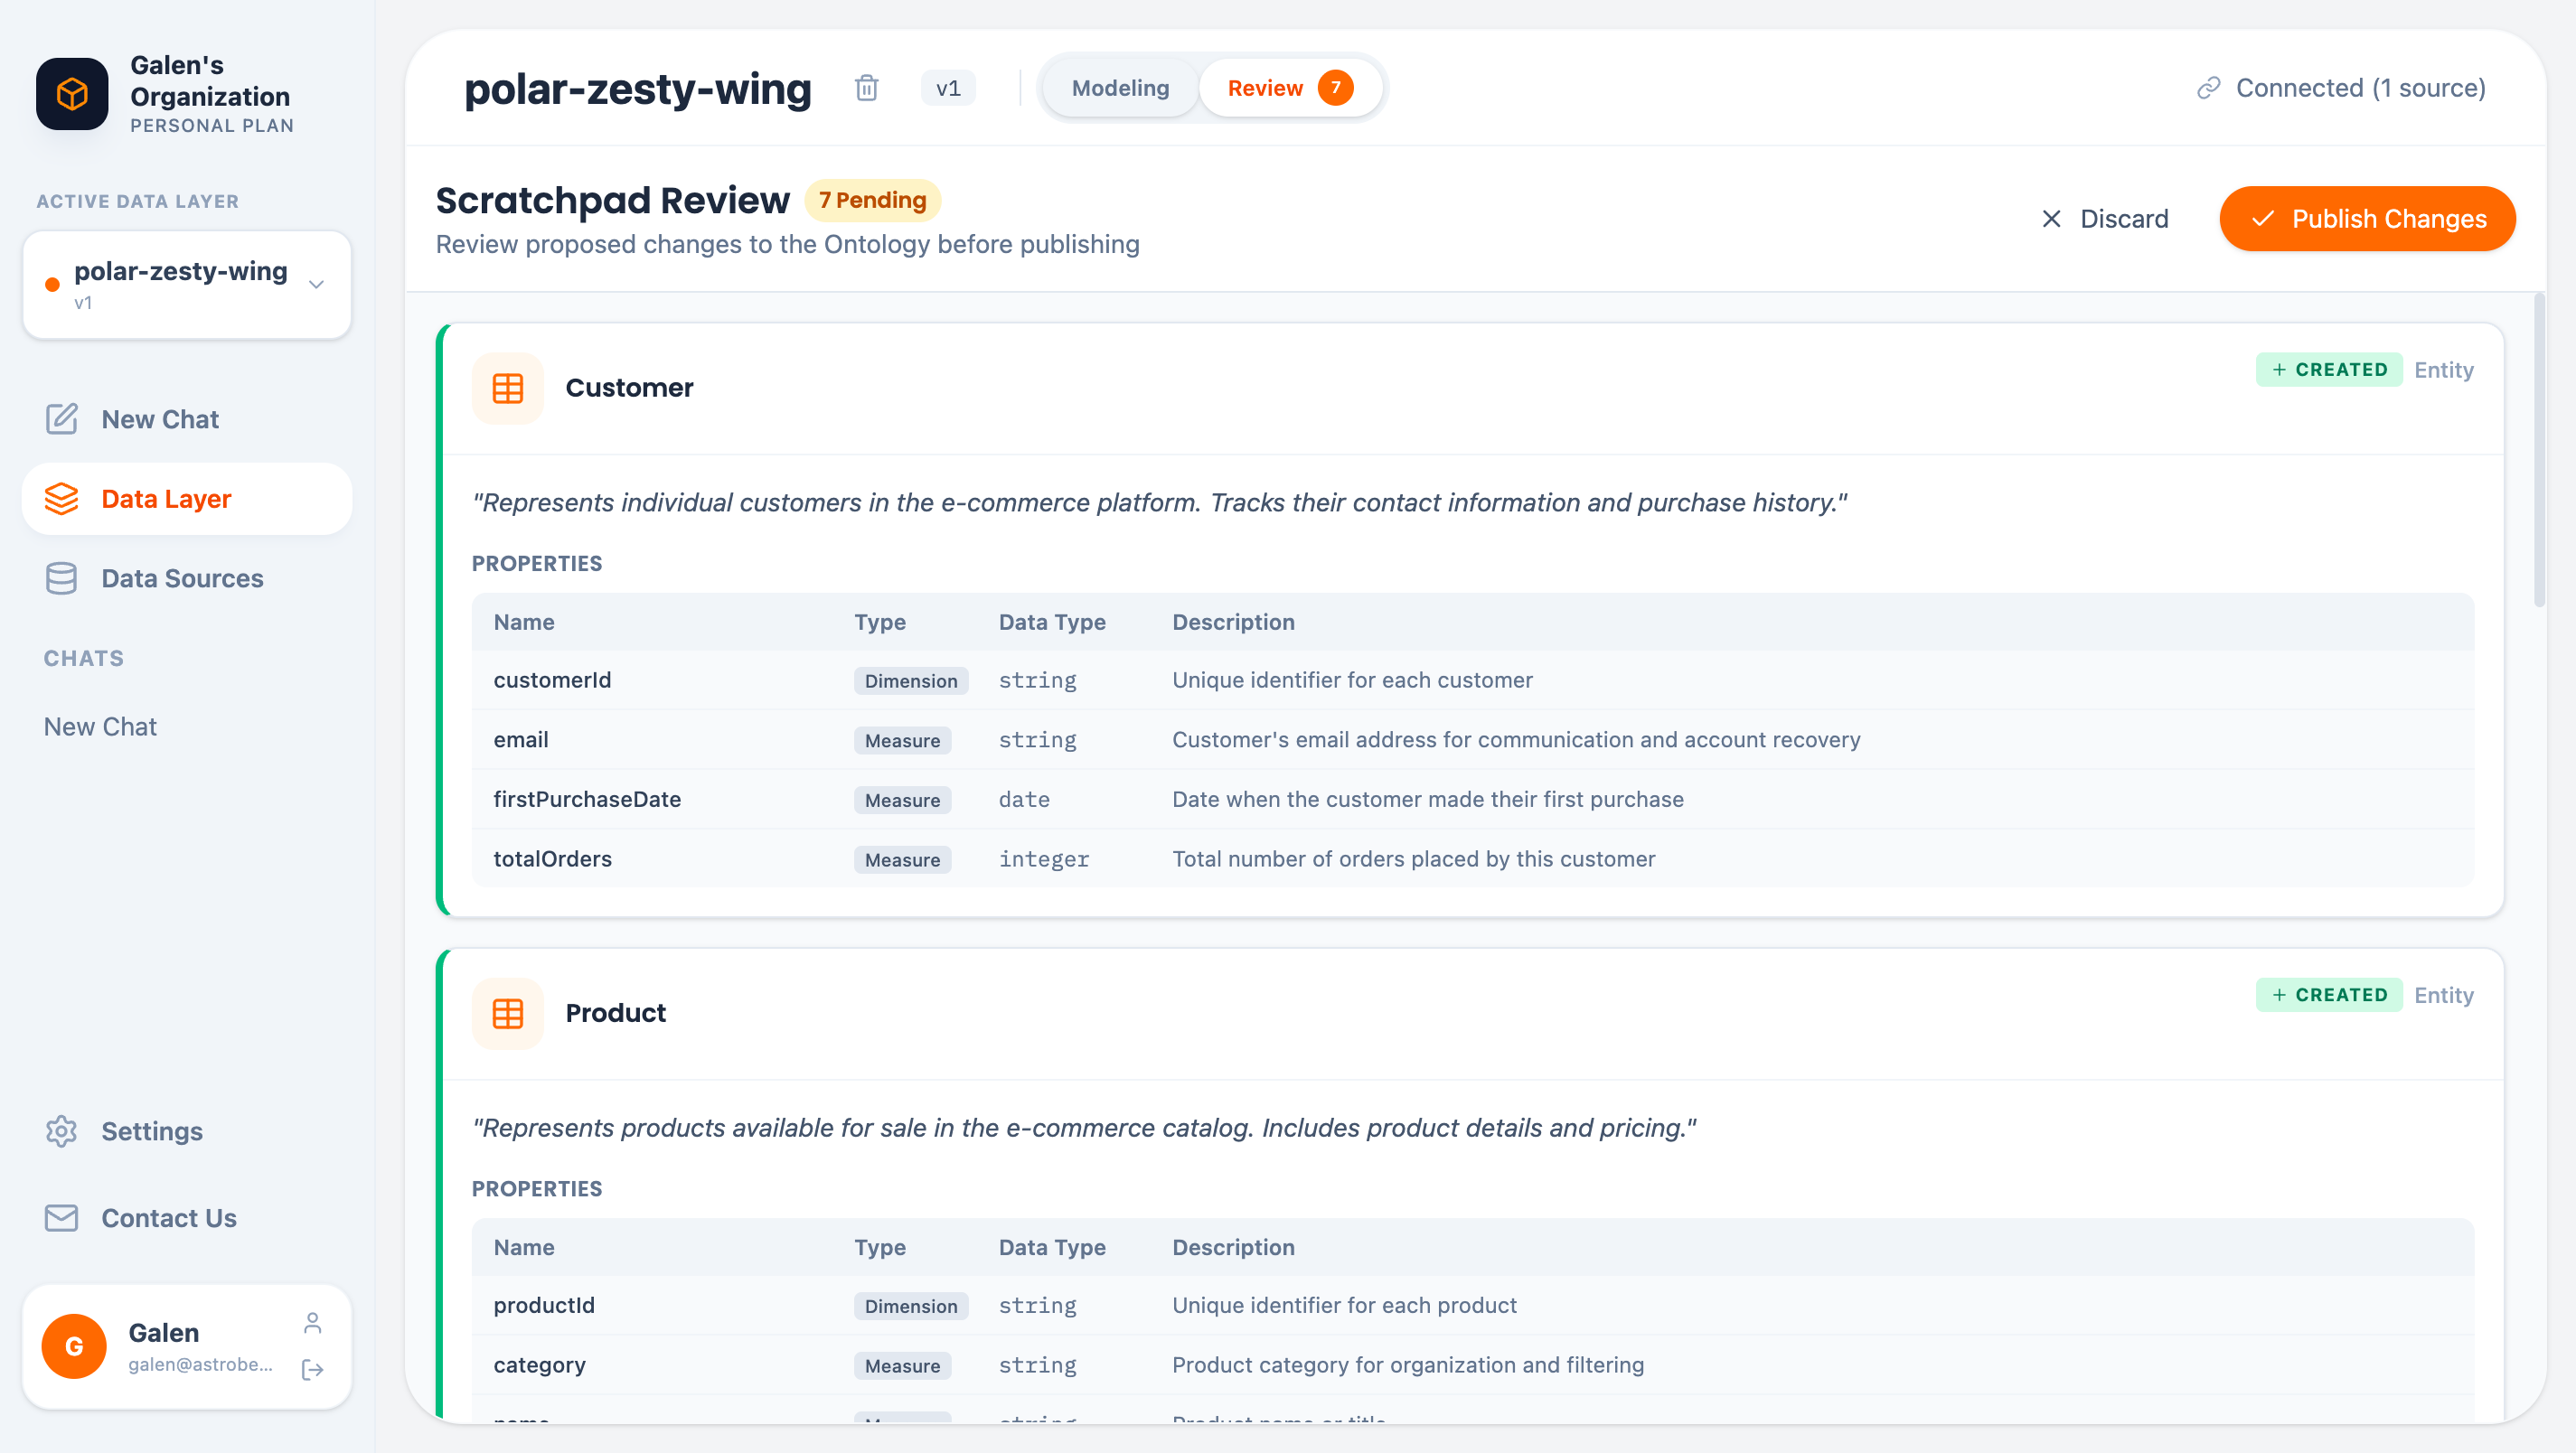
- Created items (new entities, properties, relationships)
- Modified items (updated definitions)
- Deleted items (removed elements)
- Publish all pending changes — Apply changes and create a new version
- Discard all pending changes — Revert the scratchpad
Version History
Every time you publish, AstroBee creates a new version. View history by clicking the version buttons: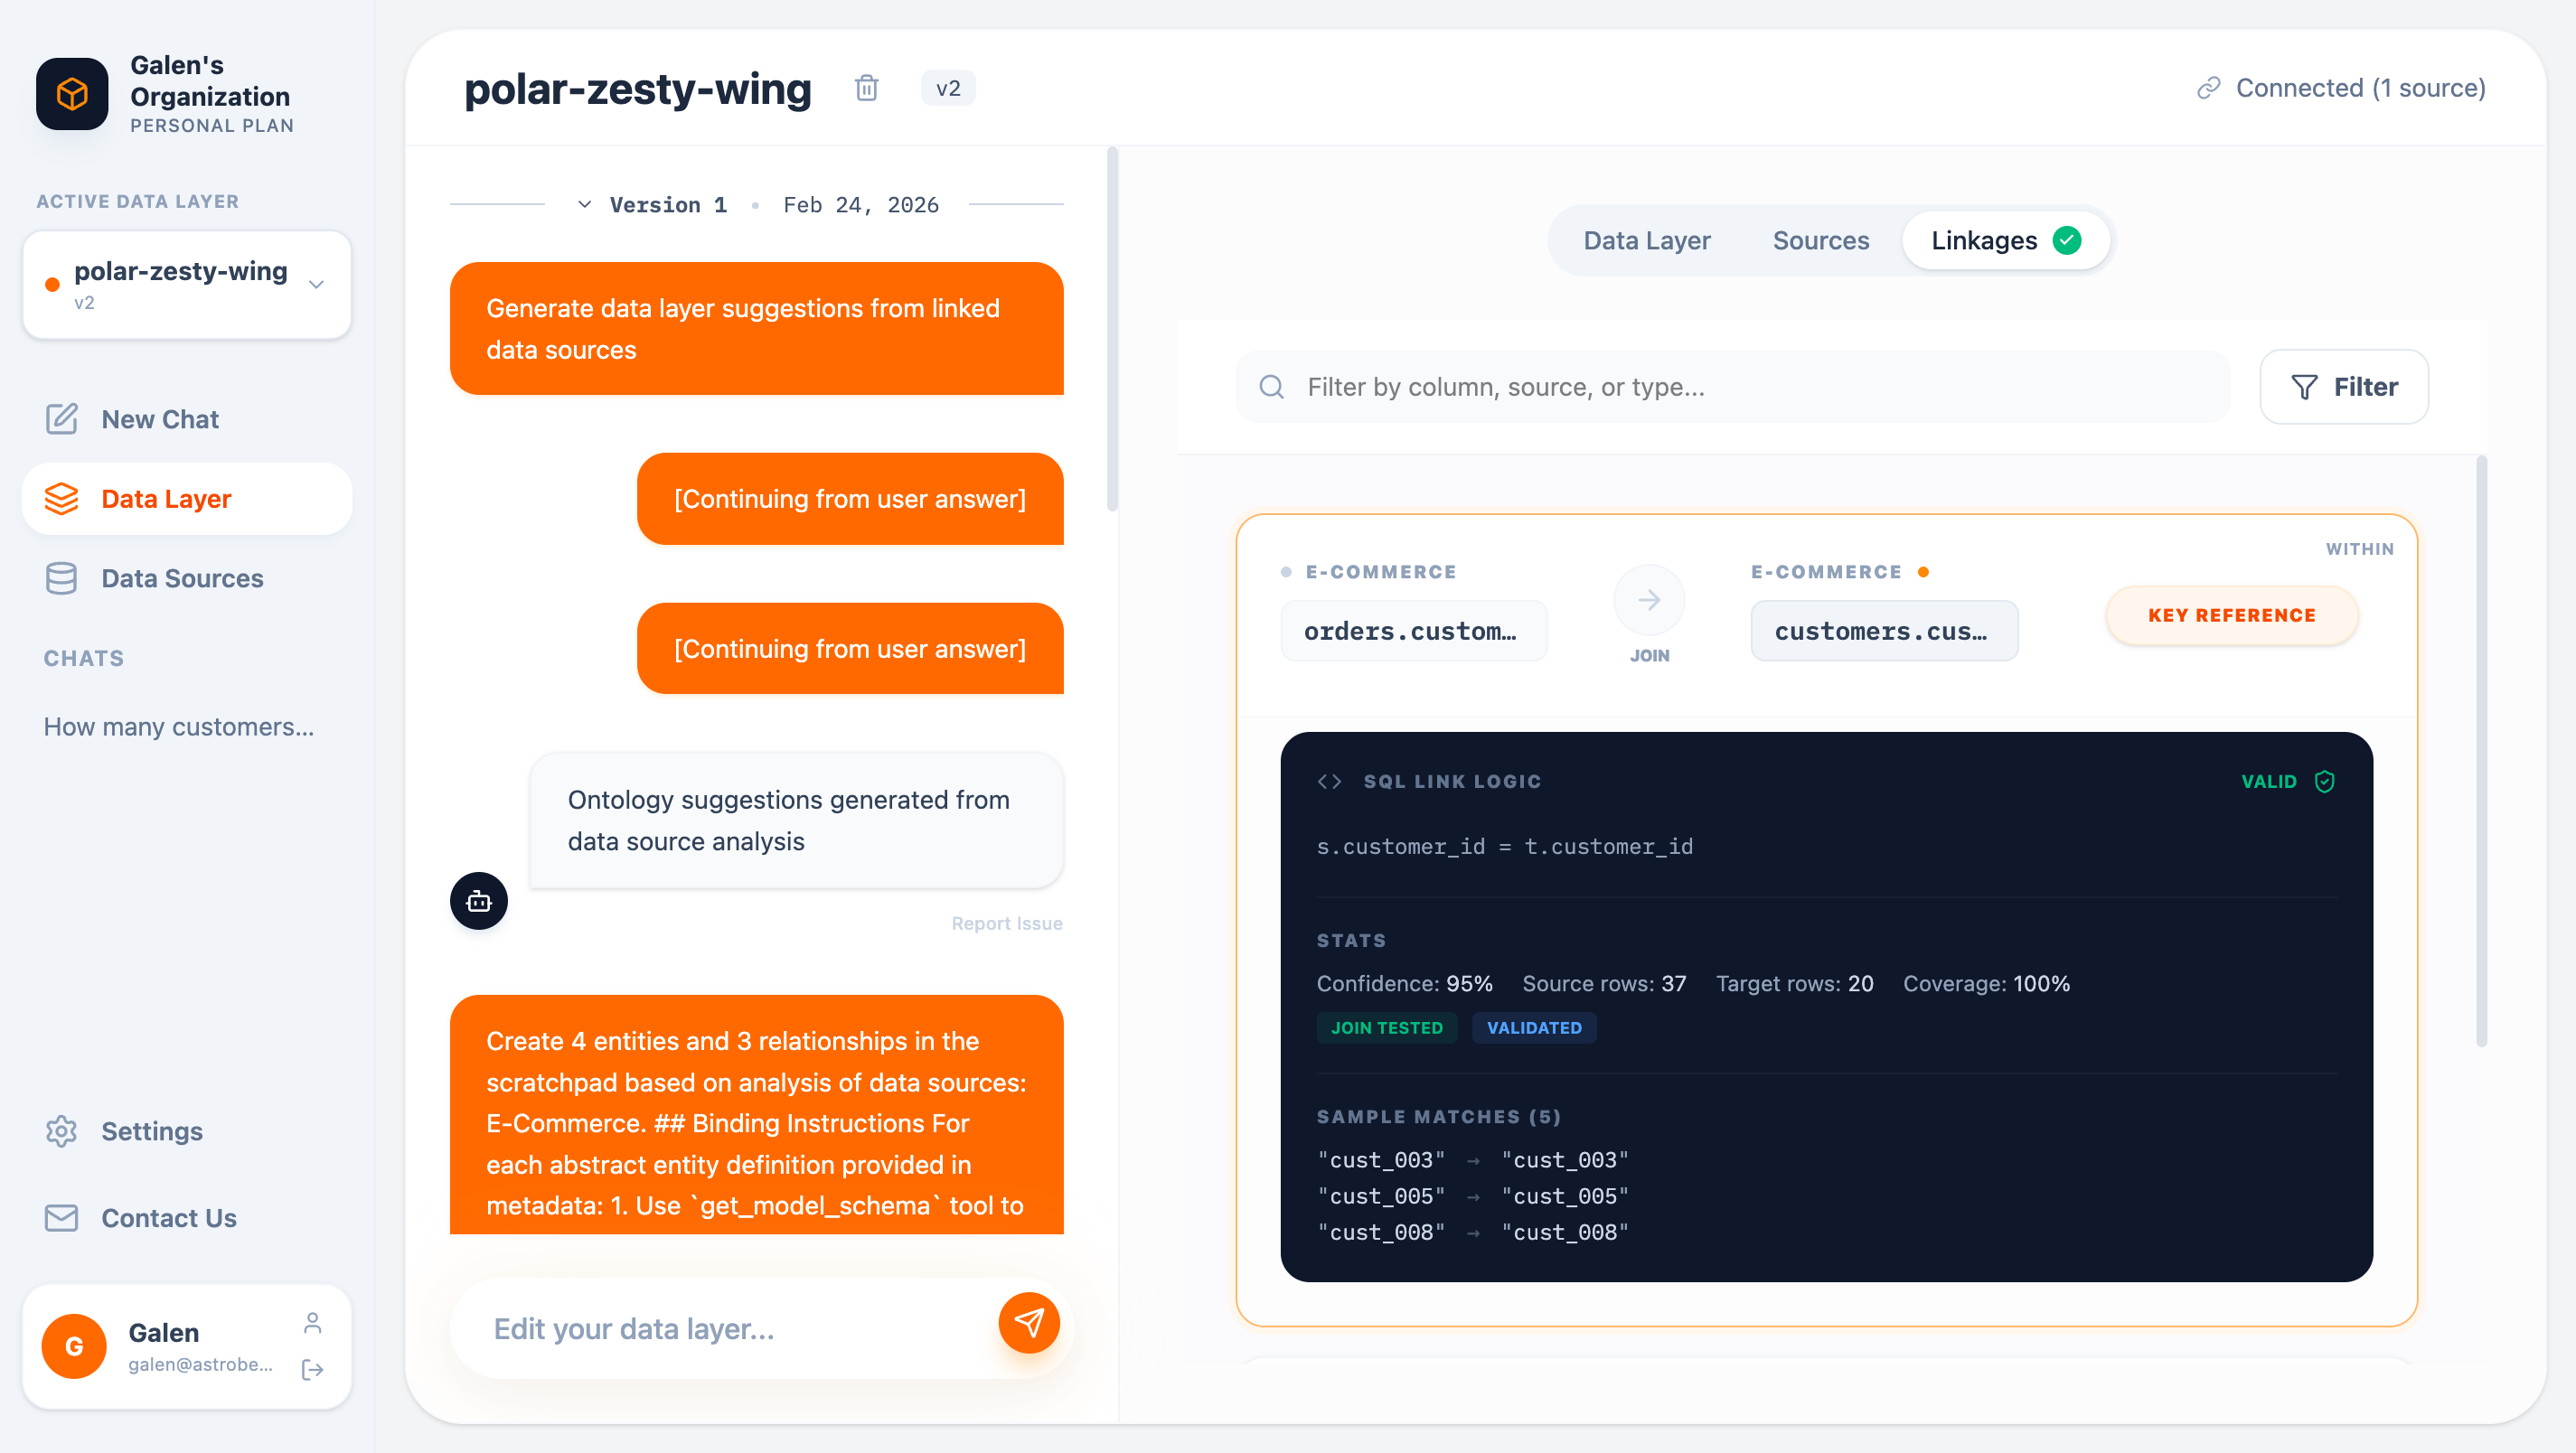
- Timestamp of each version
- Conversation history (what was discussed to create that version)
- Ability to view any previous version
Versions are immutable. To make changes, edit the current version and publish a new one.
Linkage Discovery
The Linkages tab shows relationships AstroBee discovered between your source tables: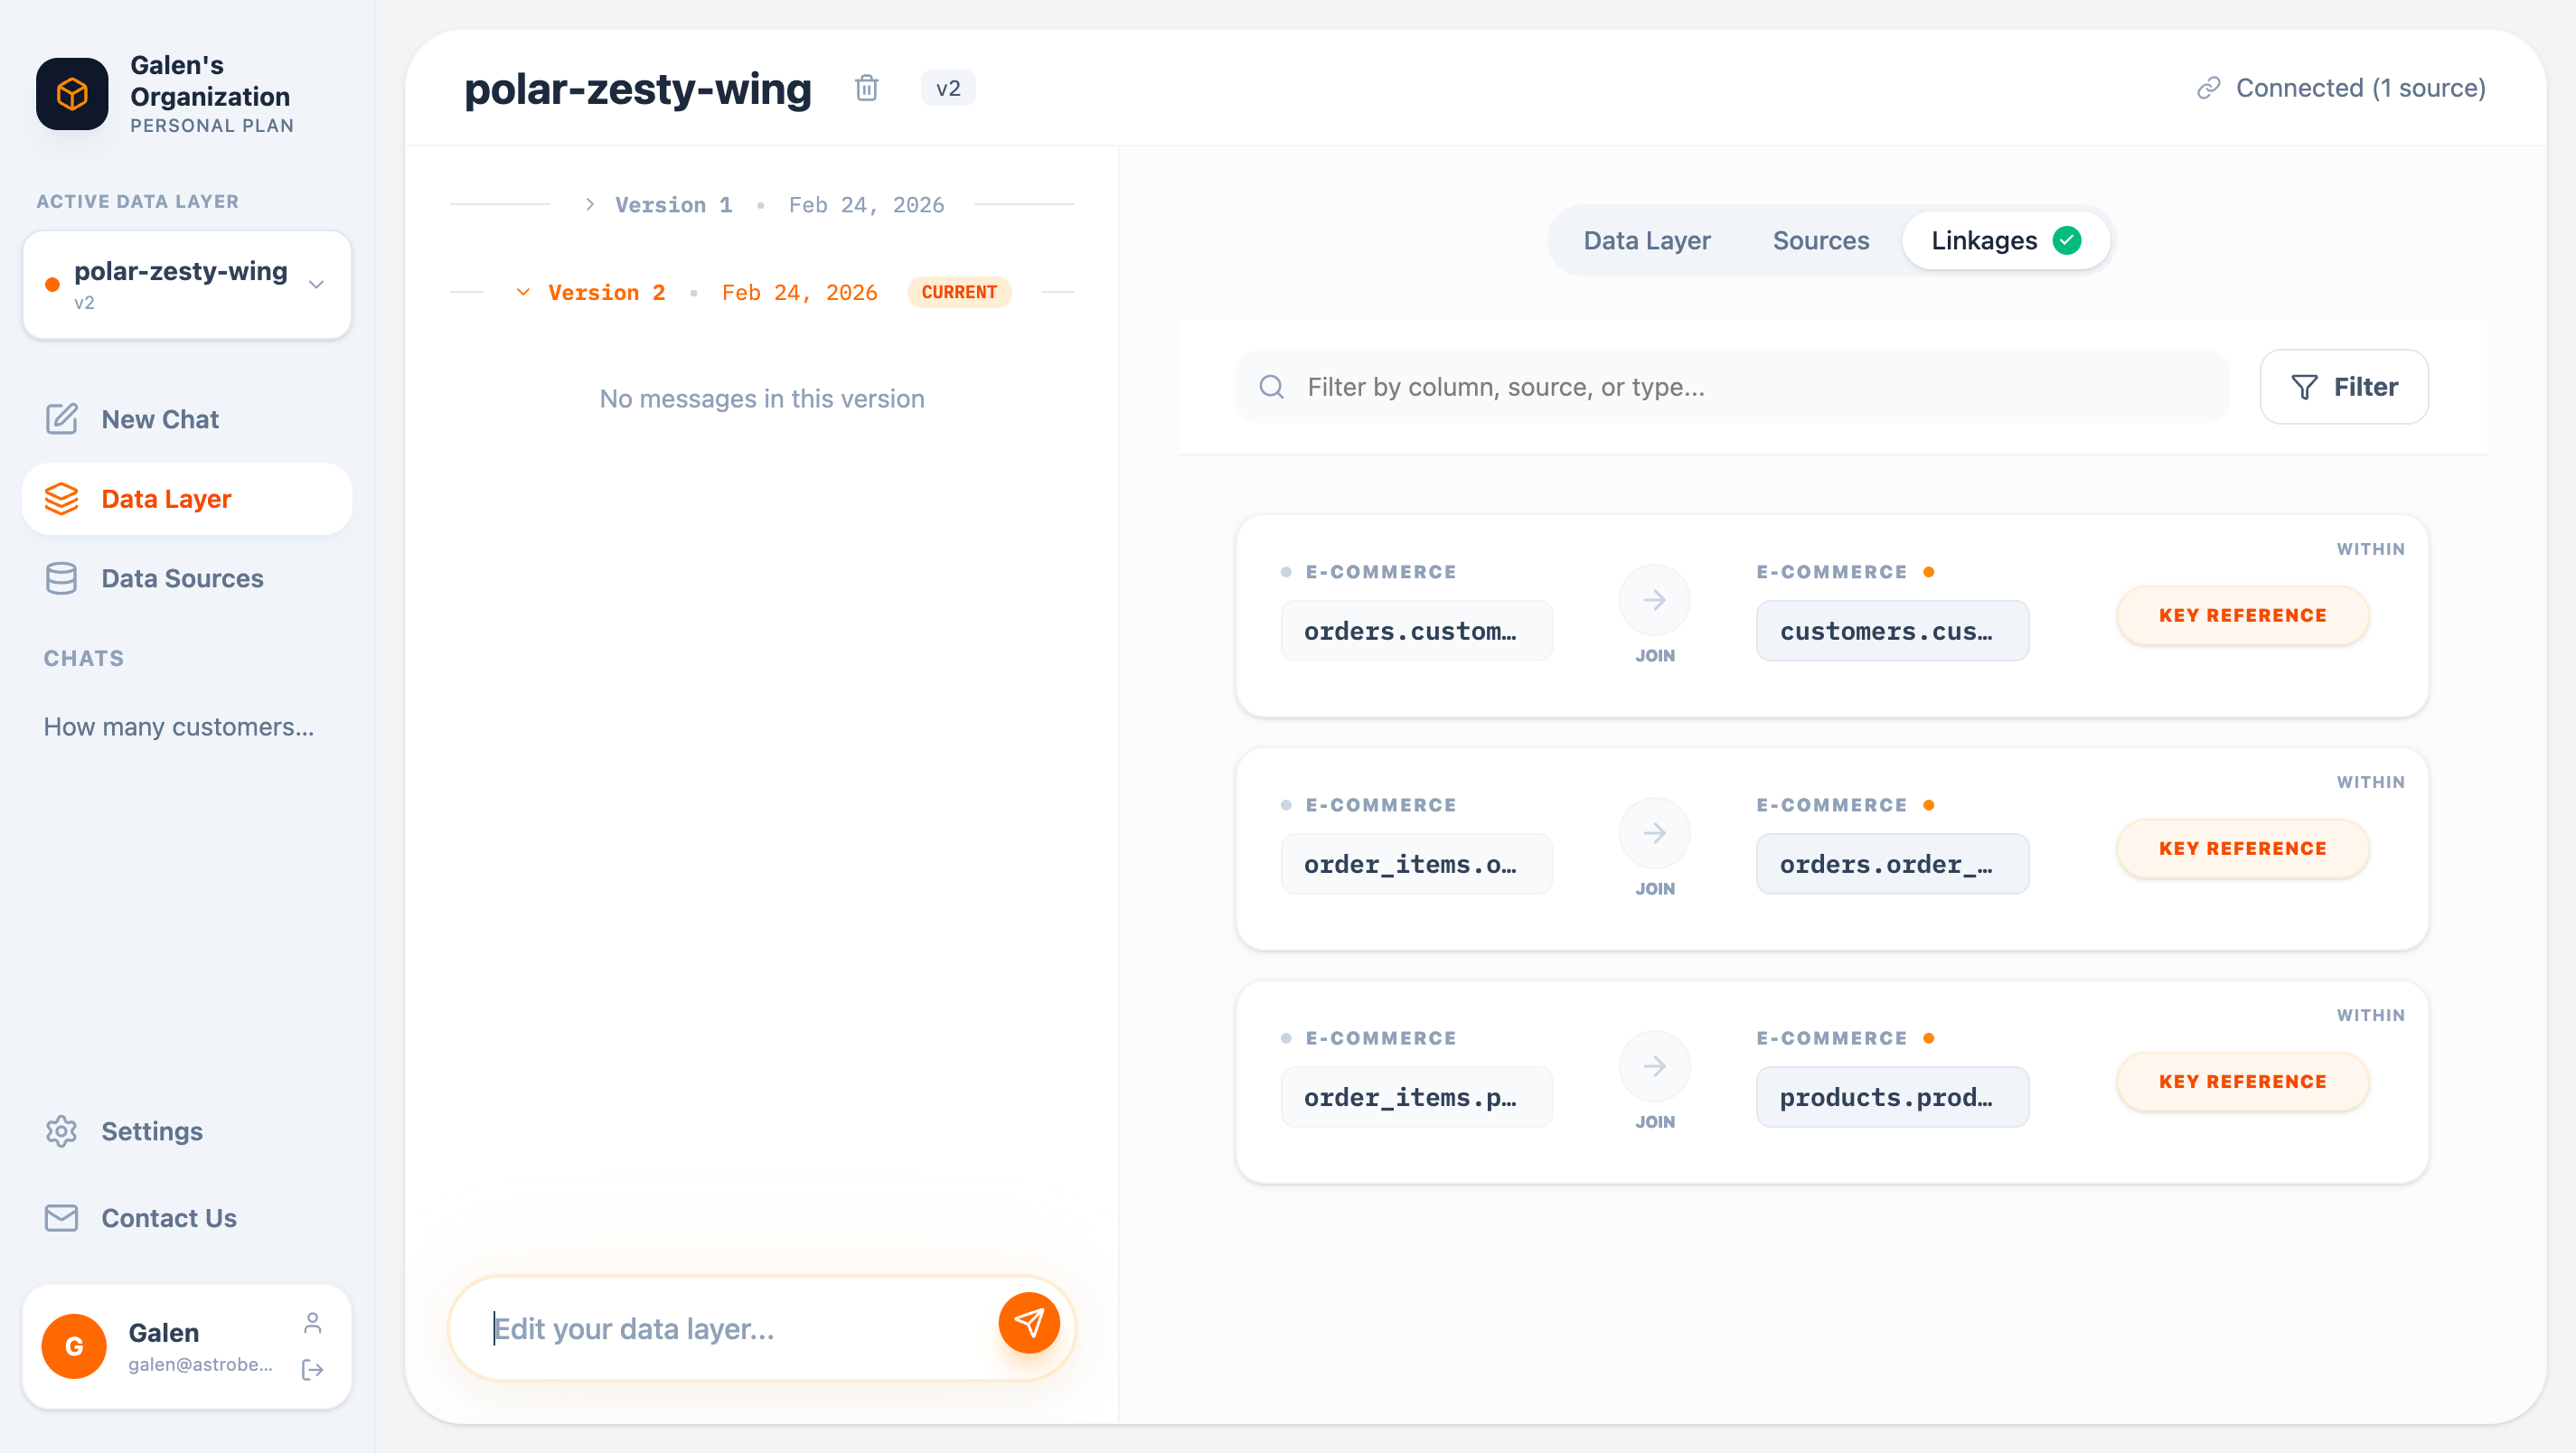
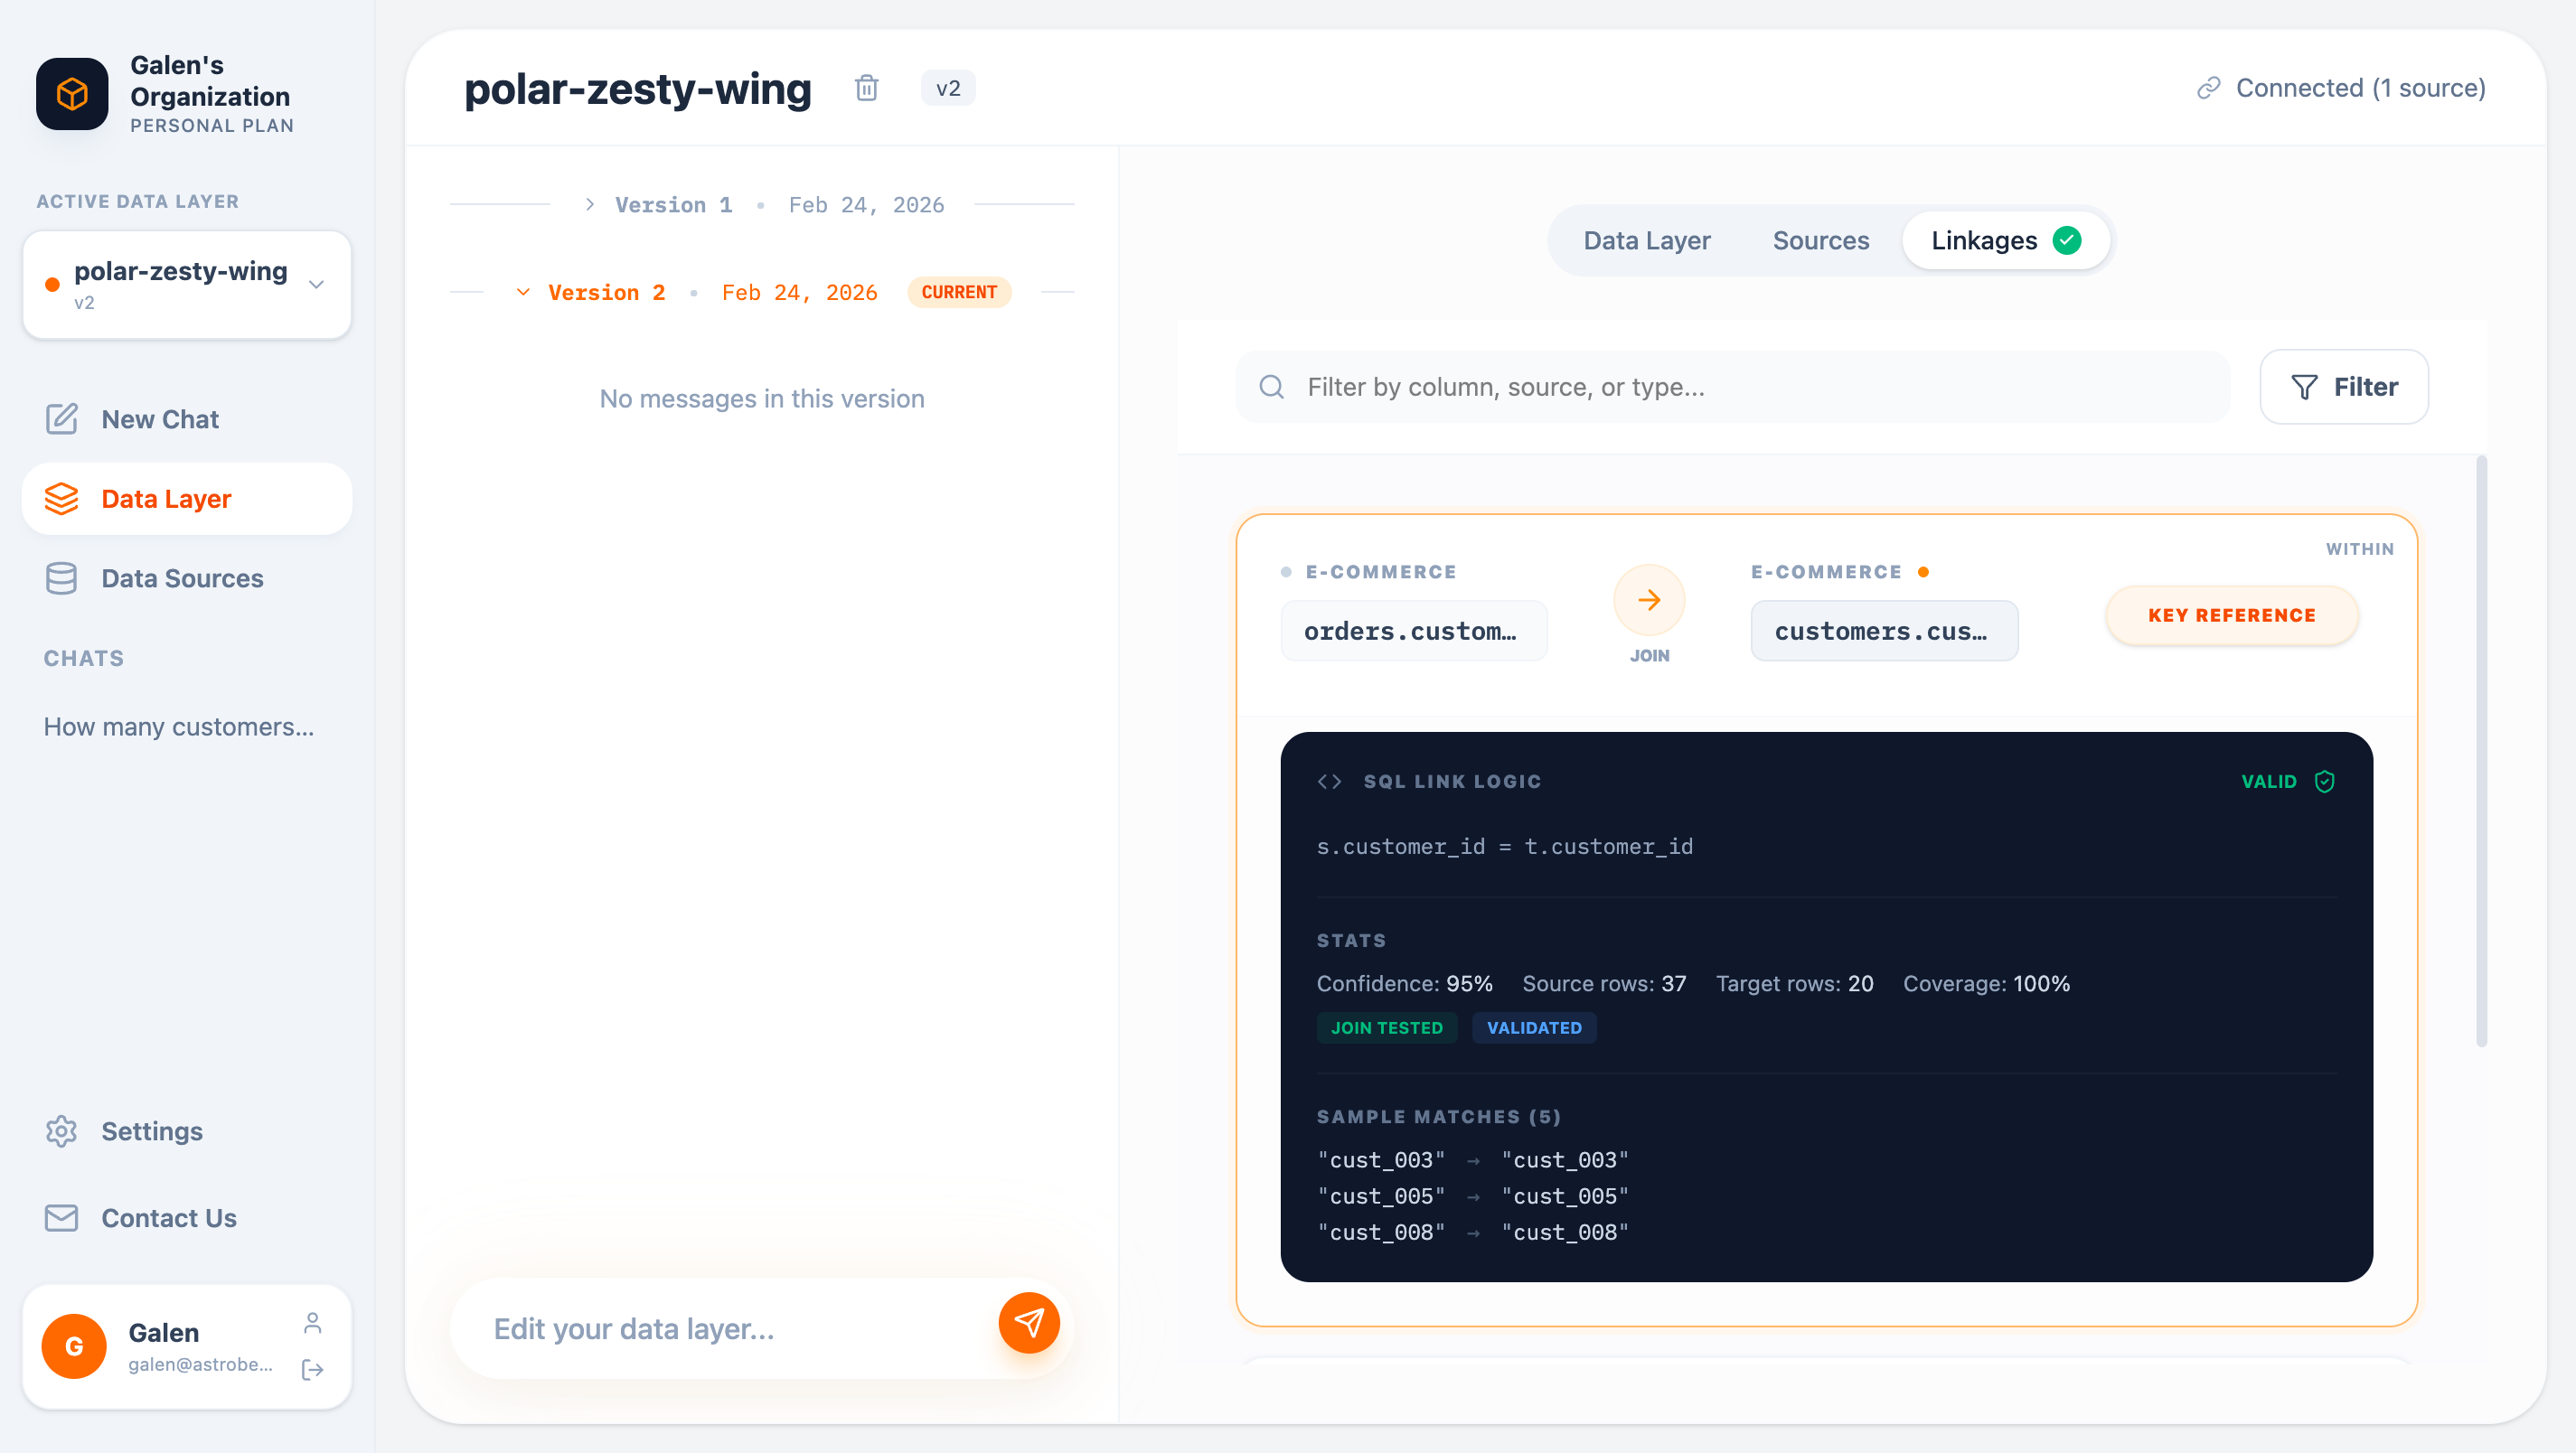
- SQL join logic — The actual join condition
- Validation status — Whether the join was tested
- Statistics — Confidence, coverage, row counts
- Sample matches — Example values that match
Entity Types
AstroBee uses three entity types:| Type | Purpose | Example |
|---|---|---|
| Dimension | Descriptive attributes for grouping/filtering | Customer, Product, Region |
| Fact | Measurable events or transactions | Order, PageView, Payment |
| Bridge | Junction tables for many-to-many relationships | OrderItem, UserRole |
Property Types
Properties are classified as:| Type | Purpose | Example |
|---|---|---|
| Dimension | Attributes for grouping or filtering | customer_id, category, status |
| Measure | Numeric values for aggregation | price, quantity, total_amount |
Best Practices
Start with AI generation
Start with AI generation
Let AstroBee create the initial structure, then refine. It’s faster than building from scratch.
Use descriptive names
Use descriptive names
Entity and property names should match how your team talks about the business.
Add descriptions
Add descriptions
Good descriptions help AstroBee understand context when answering questions.
Review linkages
Review linkages
Check the Linkages tab to ensure discovered relationships are correct before building on them.
Version frequently
Version frequently
Publish often to maintain a clear history of changes.
Next Steps
Analytics Chat
Ask questions about your data layer
Connect Data Sources
Add more data to your data layer